Was fehlt: Die Beschreibung der Werstatt und der Rahmenlehre.
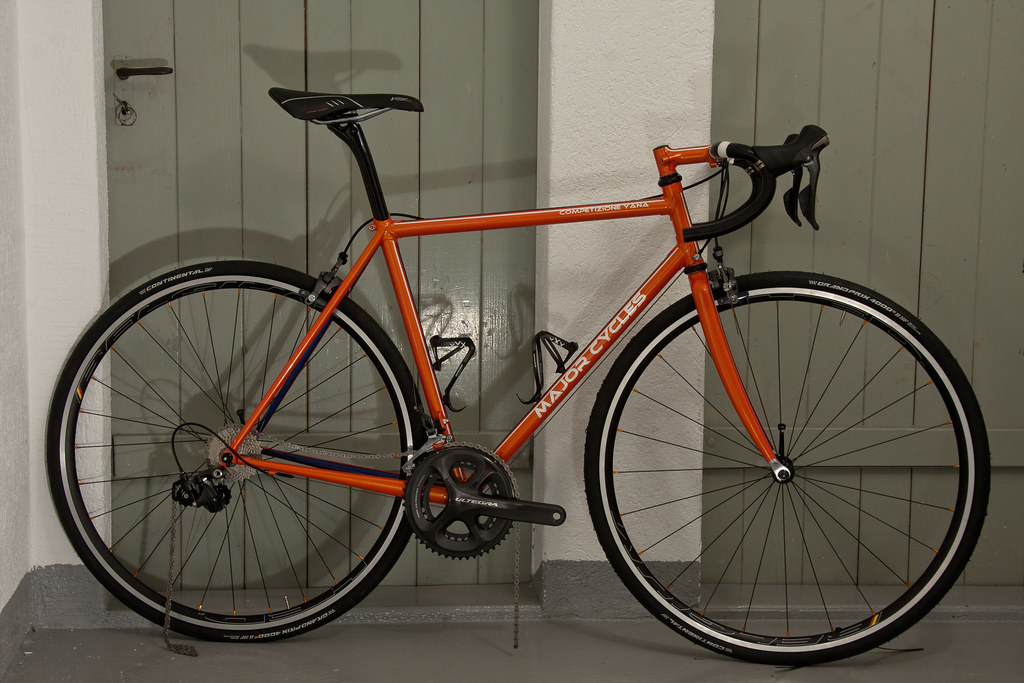
Projektbeschreibung Major Cycles “Competizione Yana”
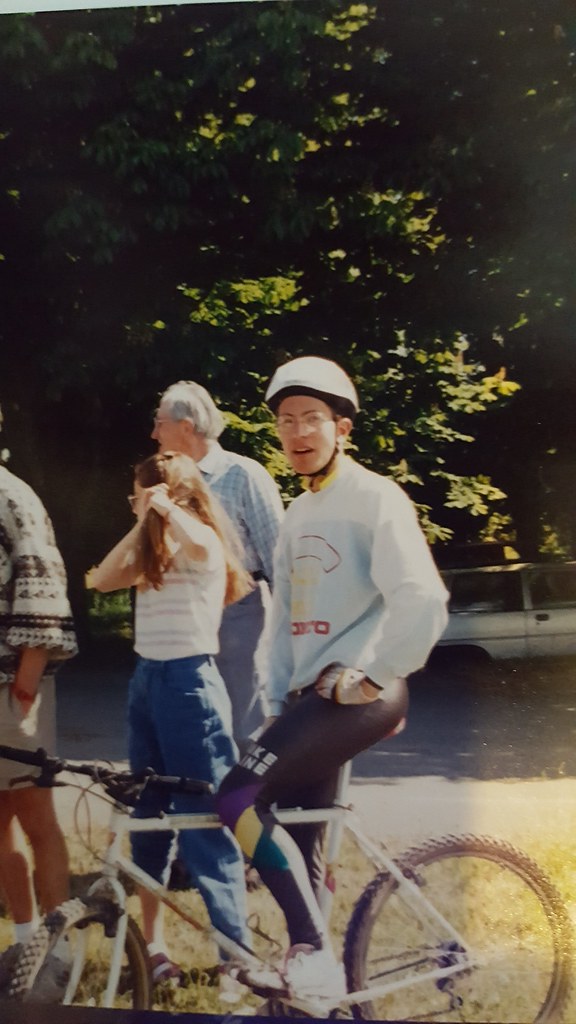
Owner: Yana Mazurenko
Framebuilder: Thomas Gebhardt
Inhaltsverzeichnis
Projektbeschreibung Major Cycles “Competizione Yana” 1
Projekt-Definition / Zielsetzung 1
Wünsche, Ziele, Image 4
Geometrie 4
Rohrdurchmesser 5
Ausstattung Rad: 5
Design und Farben: 8
Ergebnis 11
Projekt-Definition / Zielsetzung
Kundin:
Rennradfahrerin mit eher geringer Erfahrung.
Optimale Sitzposition muss gemeinsam erarbeitet werden.
Rennrad für Touren von zunächst 30km bis später über 100km
Bike Fitting / Geometriedefinition:
Eine Anpassung des Rades an den neuen Besitzer sollte die Basis für jedes Rahmenbau-Projekt bilden. In meinen Augen ist die höchste Priorität bei jedem Fahrrad, dass es dem Fahrer bzw. der Fahrerin perfekt passt.
Im Rahmen des Projekts gab es viele Besonderheiten in Bezug auf die Geometrie-Festlegung:
- Eine sehr anspruchsvolle Kundin
- Eine Kundin mit wenig Erfahrung mit Rennrädern
- Sehr viel Zeit für die Ermittlung der optimalen Sitzposition und Geometrie
- Sehr gut bekannte Vorstellungen und Bedürfnisse der Kundin
Das Kurioseste ist wohl, dass ich mir mehr als 3 Jahre Zeit nehmen konnte, um die finale Geometrie festzulegen. Das lag vor allem daran, dass der Bau des Rahmens so spät startete. In der ganzen Zeit hatte ich die Gelegenheit, die Sitzposition meiner Frau auf den vorhandenen Rennrädern und Pedelecs zu optimieren, bis ich sehr sicher war, daß sie perfekt passt.
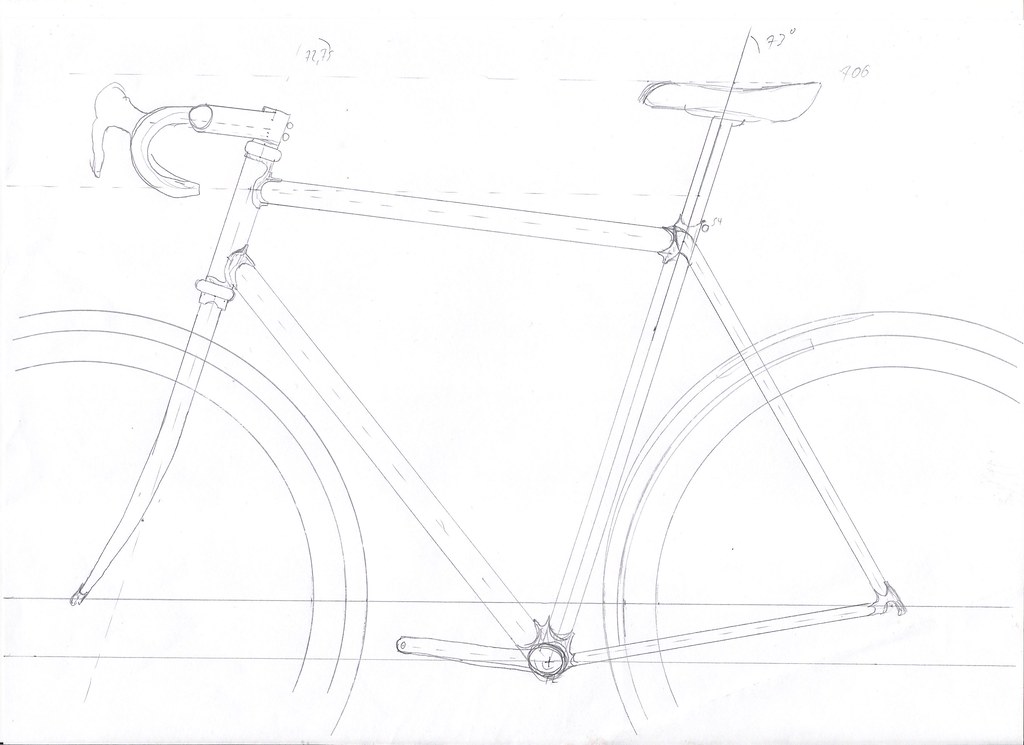
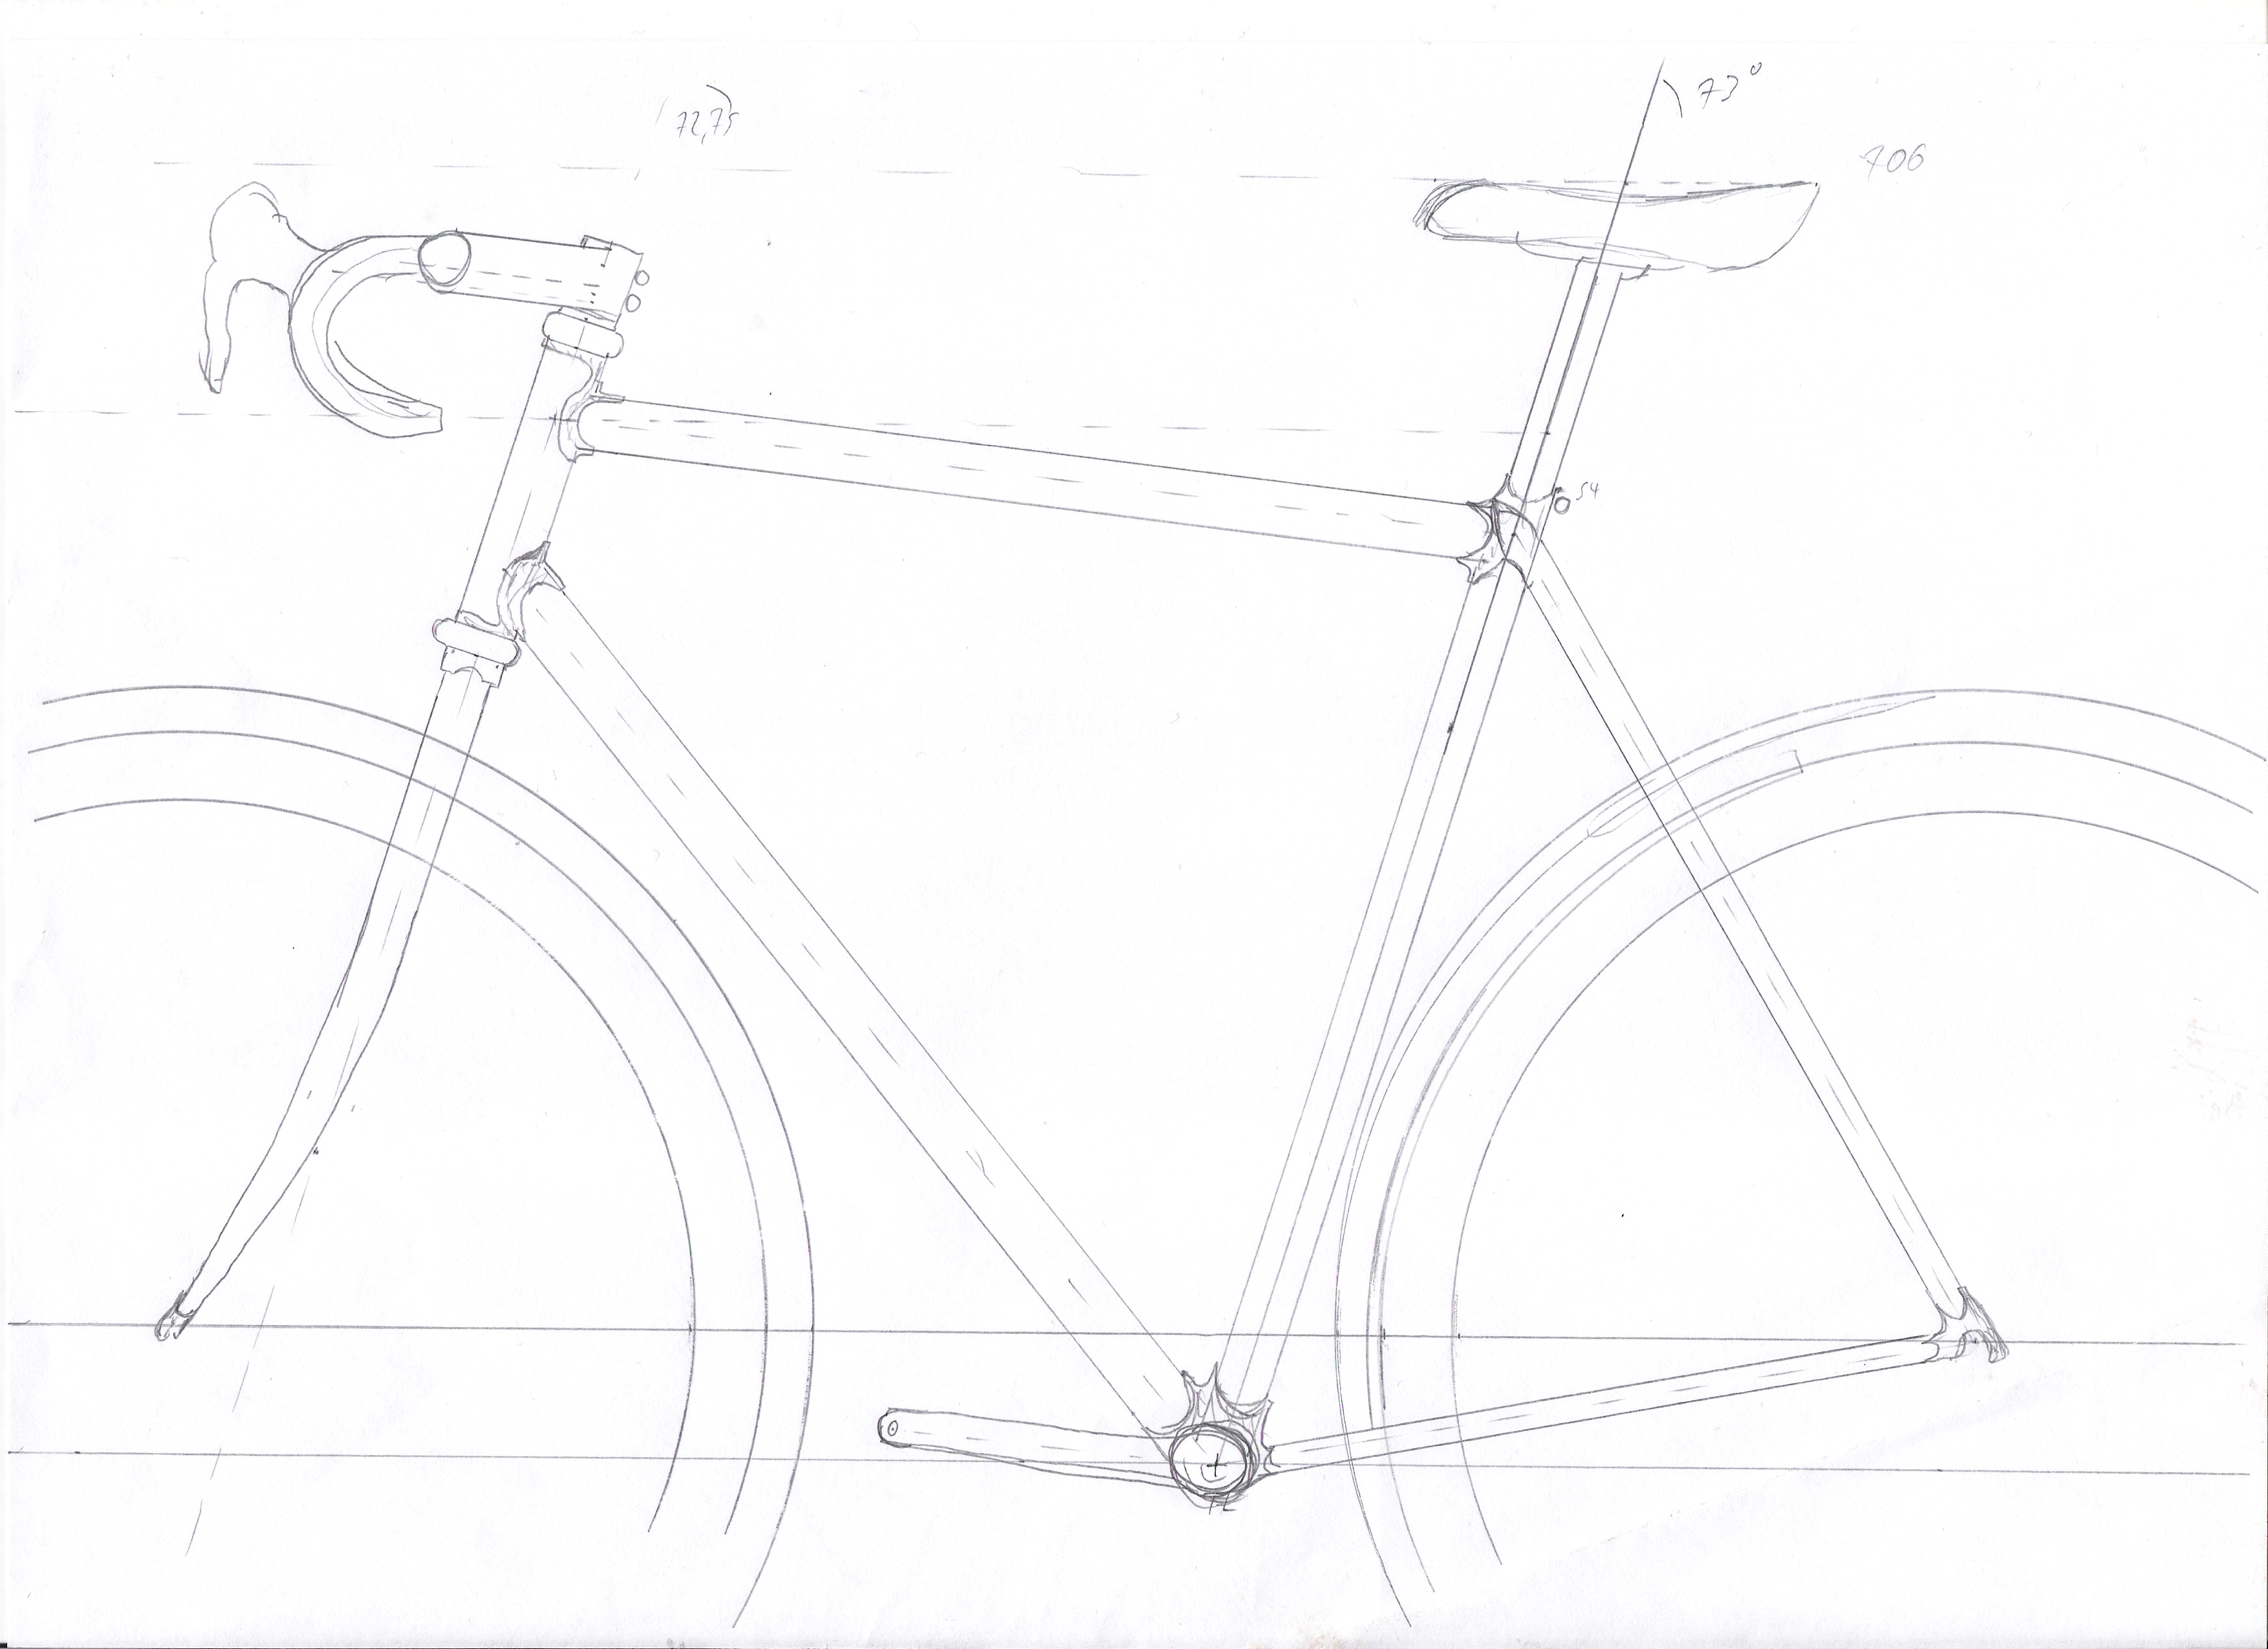
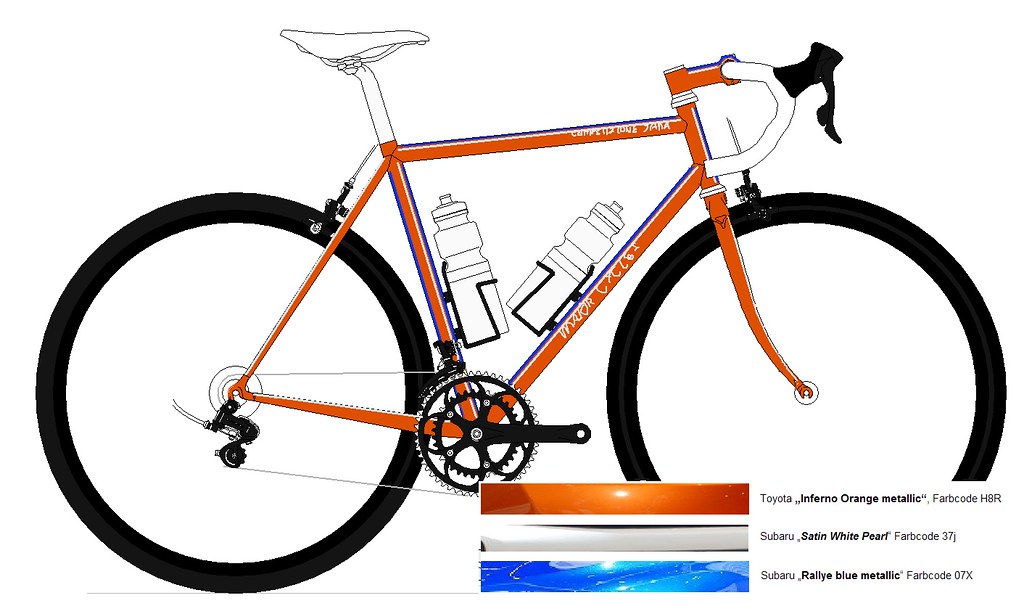
Die Abbildung auf Seite 1 zeigt meine erste Handzeichnung. Bezüglich Sattel- und Lenkerposition war das bereits sehr nah an der finalen Geometrie. Die Zeichnung zeigt auch eine der zentralen Herausforderungen des Projekts: Einen kleinen Rahmen zu bauen, der eine Sattelüberhöhung von nur 6cm harmonisch umsetzt. Dies war der Hauptgrund für mich, ein um 6° abfallendes Oberrohr und einen 1cm hohen Steuerrohr-Überstand umzusetzen. Im Ergebnis entstand ein Rahmen mit nomineller Rahmenhöhe von 55,5cm. Von dort ist das Oberrohr zunächst um 1cm abgesenkt und fällt dann in einem 6-Grad-Winkel zum Sitzrohr hin ab. Diese Maße wurden aus der bekannten Sattel- und Lenkerposition und den geplanten Komponenten wie Sattelstütze, Vorbau, Lenker und Steuersatz abgeleitet.
Das heißt, der Rahmen musste wirklich kurz werden.
Natürlich gibt es Frauen, denen Männerrahmen perfekt passen.
Tatsächlich haben Frauen oft längere Beine und kürzere Oberkörper und Arme als Männer. Aber das Problem, daß kleine Rahmen oft zu lang sind, ist zugegebenermassen kein reines Frauen-Problem.
Die finale Geometrie hat einen 73° Sitzrohrwinkel und eine virtuelle Oberrohrlänge von 52cm.
Viele Serienrahmen sind in kleinen Größen verhältnismäßig lang, um Zehenkontakt mit dem Vorderrad zu vermeiden. Um das zu verstecken, werden ultrasteile Sitzrohrwinkel verbaut, um ein scheinbar kürzeres Oberrohr zu realisieren. Da die perfekte Sitzposition oberstes Ziel meiner Arbeit war, war das für mich keine Option. Gleichzeitig wollte ich keinen zu flachen Steuerrohrwinkel umsetzen, da soetwas beim Fahren oft wenig Spaß macht. Am Ende stand ein moderat kurzer Vorbau, ein moderater Steuerrohrwinkel von 72,5° und eine Gabel mit 48mm Vorbiegung, was geradeso fußfrei ist. Gleichzeitig konnte ich genau den geplanten Nachlauf umsetzen.
Das Ergebnis erfüllt genau das, was wir uns davon erhofft hatten: Ein perfekt passendes Rad für eine Person mit kurzem Oberkörper und gleichzeitig ein perfektes, neutrales und trotzdem lebendiges Fahrverhalten. Dank der moderaten Sitzposition und des perfekten Kompaktlenkers passt das Rad in allen Lenkerpositionen perfekt.

Ein schöner Effekt des konsequenten “outside-in-engineerings” sind die für ein sehr kurzes und hohes Rennrad erstaunlich harmonischen Proportionen. Bei den amerikanischen Rahmenbauern gibt es dafür einen Begriff: “visually proper“. Für mich ist das ein zentraler Teil meiner Arbeit.

Wünsche, Ziele, Image
Individuelles Rennrad für Strecken von 30 – 100km
Sitzposition, die über diese Strecke problemlos zu halten ist
Intuitives Fahrverhalten
Sorglos-Ausstattung (stabiler Laufradsatz, 28mm breite Reifen, Gruppenreine Ausstattung)
Drückt Lebensfreude aus
Leuchtet in der Sonne
Passt wie massgeschneidert
Sieht aus, als wäre es massgeschneidert
Optisch harmonisch und in den Fahreigenschaften harmonisch
- Rennrad mit abfallendem Oberrohr und dennoch möglichst klassischer Geometrie
- Vorbau Stahl in Rahmenfarbe
- Farbidee: Orange-Metallic mit Blau-Metallic und weiß
Geometrie
Klassische Anmutung
Rahmenhöhe x Rahmenlänge: 55,5 x 52
Oberrohr 6° sloping
1cm Steuerrohr-Überstand
Klassischer Steuersatz
Vorbau parallel zum Oberrohr (also 6° steigend), 90mm lang
Rohrdurchmesser
Rahmen:
Steuerrohr = 31,8
Sitzrohr = 28,6
Oberrohr = 28,6
Unterrohr = 31,8
Unabhängig vom allgemeinen Trend folgen meine Rahmen dem Prinzip “so hart wie nötig”, und nicht härter. Daraus ergeben sich in diesem Projekt mit geringen Anforderungen an Fahrergewicht und an Tretkraft die oben aufgeführten, konventionellen Rohrdurchmesser: Unterrohr 31,8mm, Oberrohr 28,6mm. Ich bevorzuge zu dieser Kombination ein Steuerrohr mit Durchmesser 31,8 und folglich eine Gabel mit 1″ Schaft. Dies alles unterstützt das Ziel, bei absoluter Effizienz ein möglichst komfortables Rad zu bauen.
Gabel:
2 Gabeln sind Teil des Projekts: 1x Stahlgabel, passend gemufft und 1x Carbongabel 1″
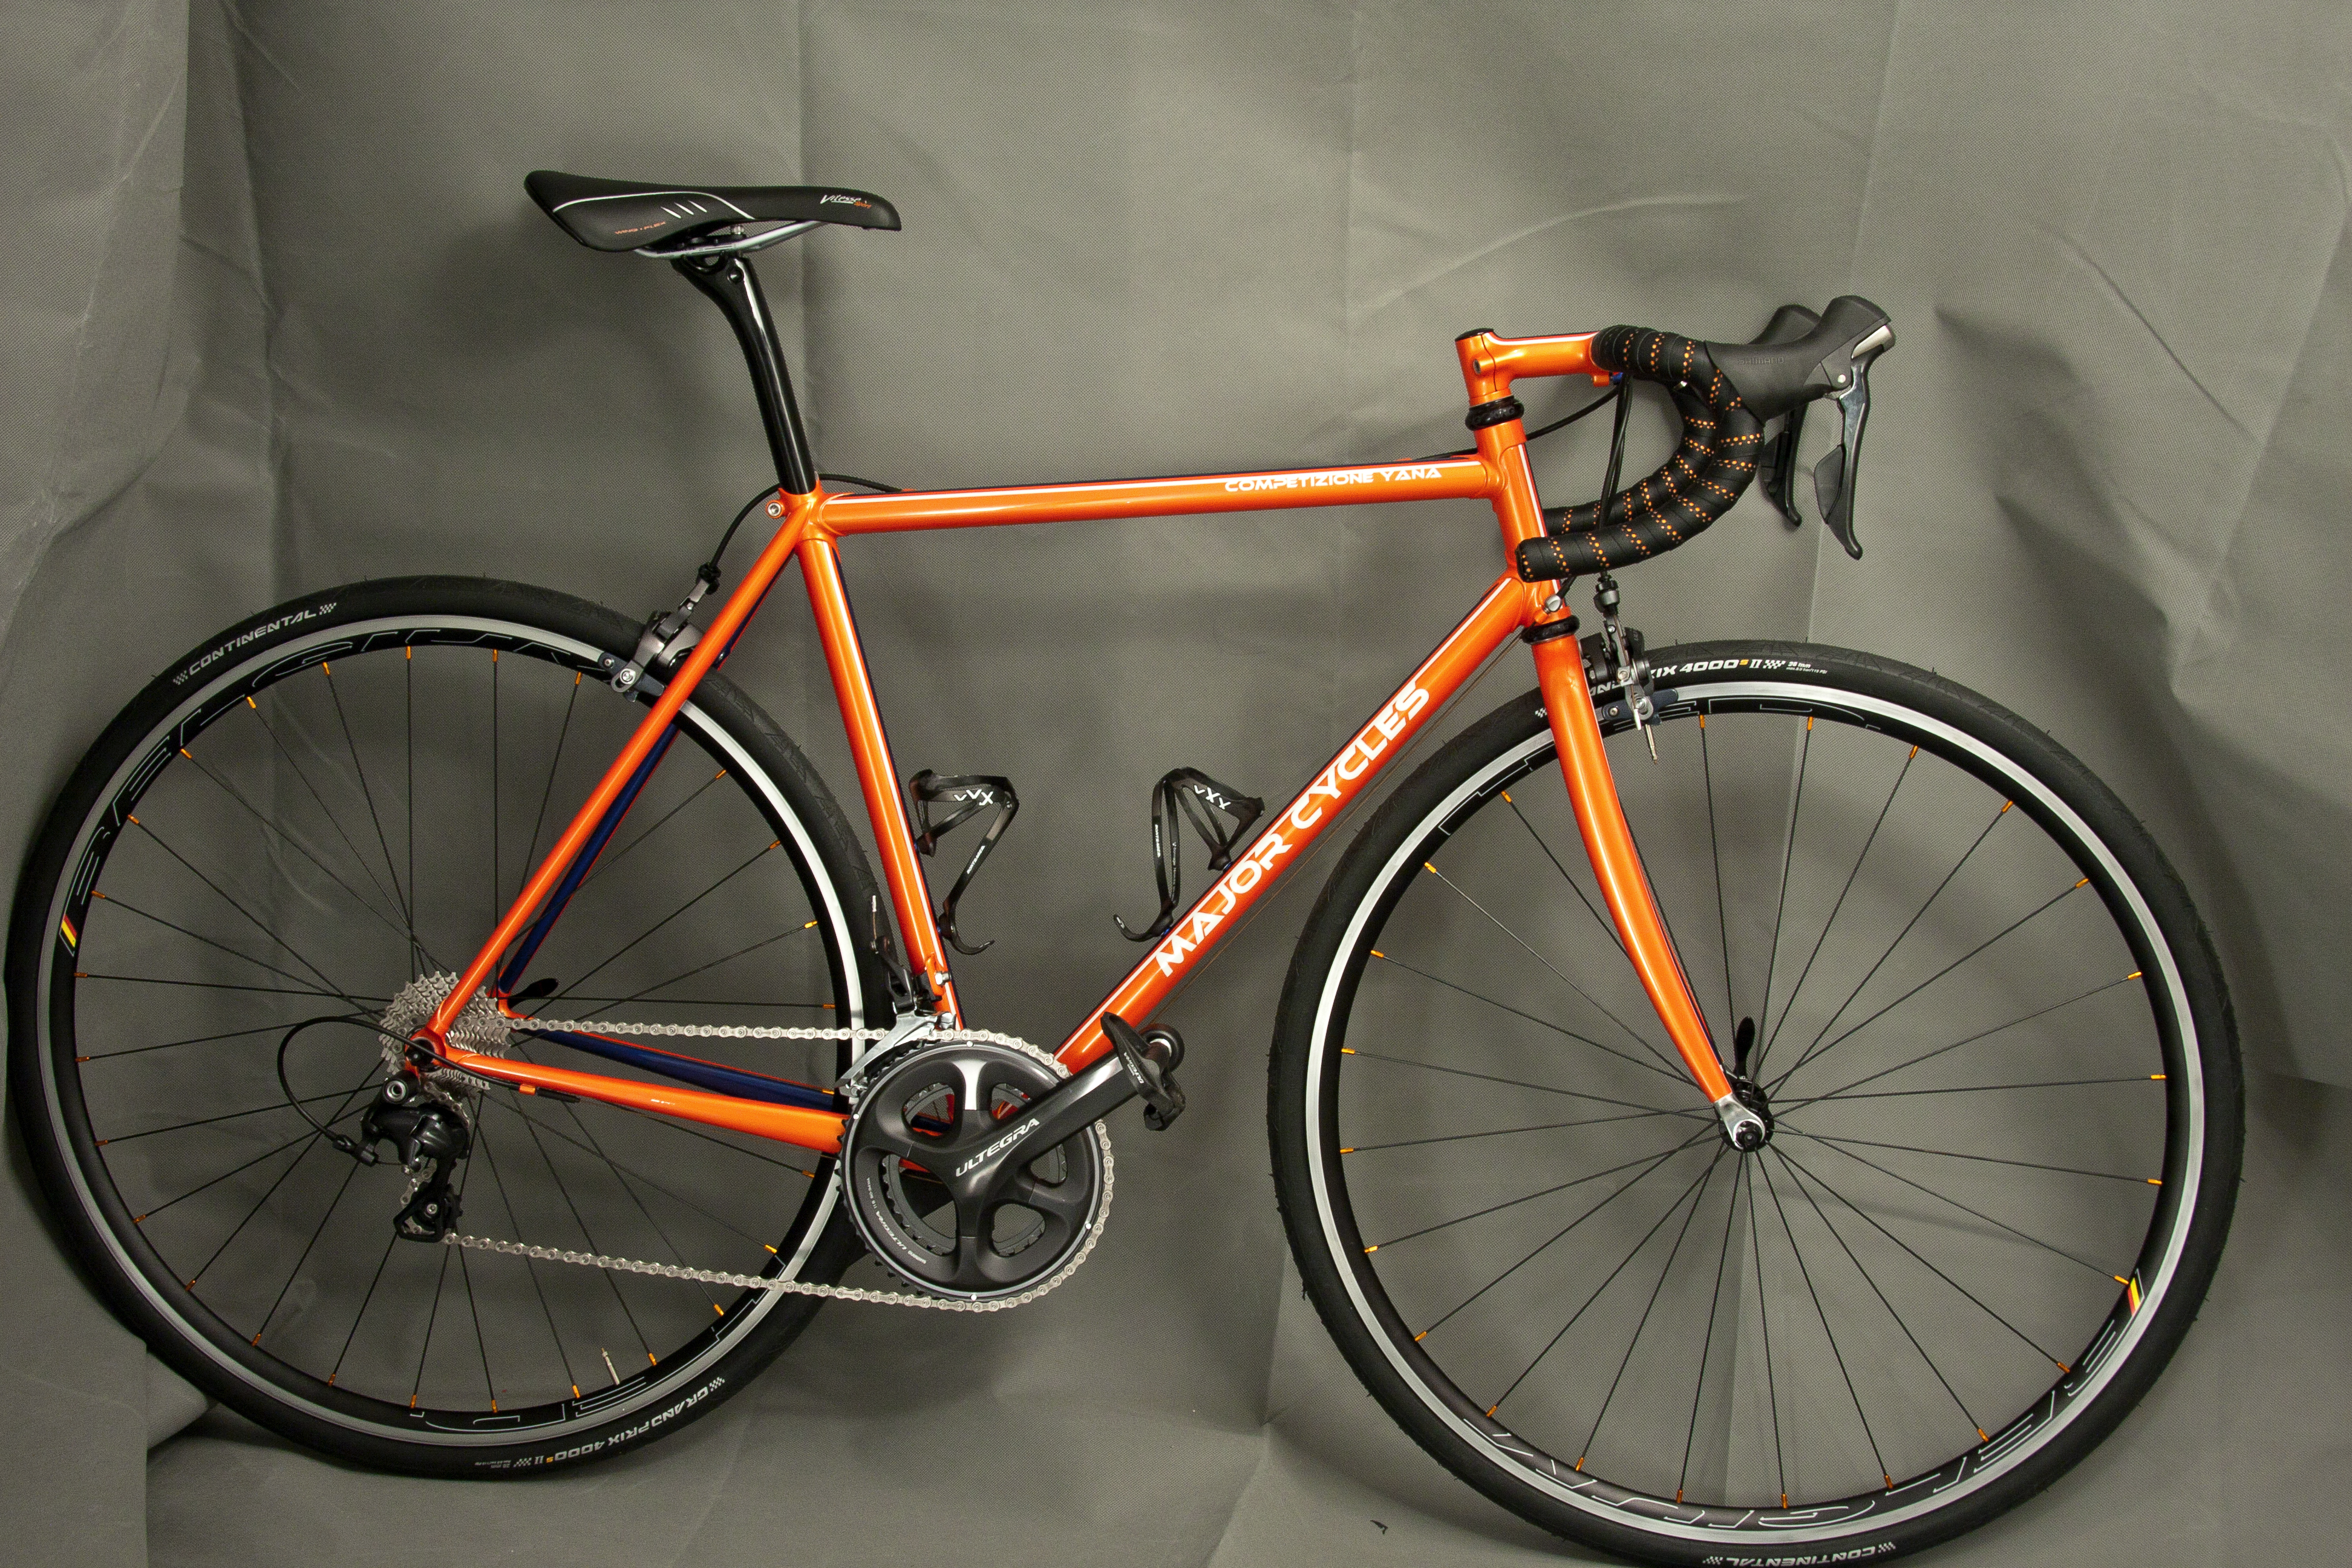
Ausstattung Rad:
Schaltbremsheben Shimano Ultegra 6800
Felgenbremsen Shimano Ultegra 6800
Vorbau Stahl, passend zum Rahmen lackiert
Kompaktlenker Soma Highway 1
Schaltwerk Ultegra 6800
Umwerfer Ultegra 6800 Anlöt
Kassette 11fach 12-28 Ultegra
Kurbel & Innenlager Shimano Ultegra 6800
Steuersatz Chris King NoThradset 1″
Laufradsatz Hed Belgium 700x19C-Felgen
Sattel Fizik Arione
Der Vorbau ist wie der Rahmen aus Stahl gelötet und kommt von Arko Bici aus Slowenien. Die Dimensionen und der Winkel sind auf das Oberrohr des Rahmens abgestimmt.

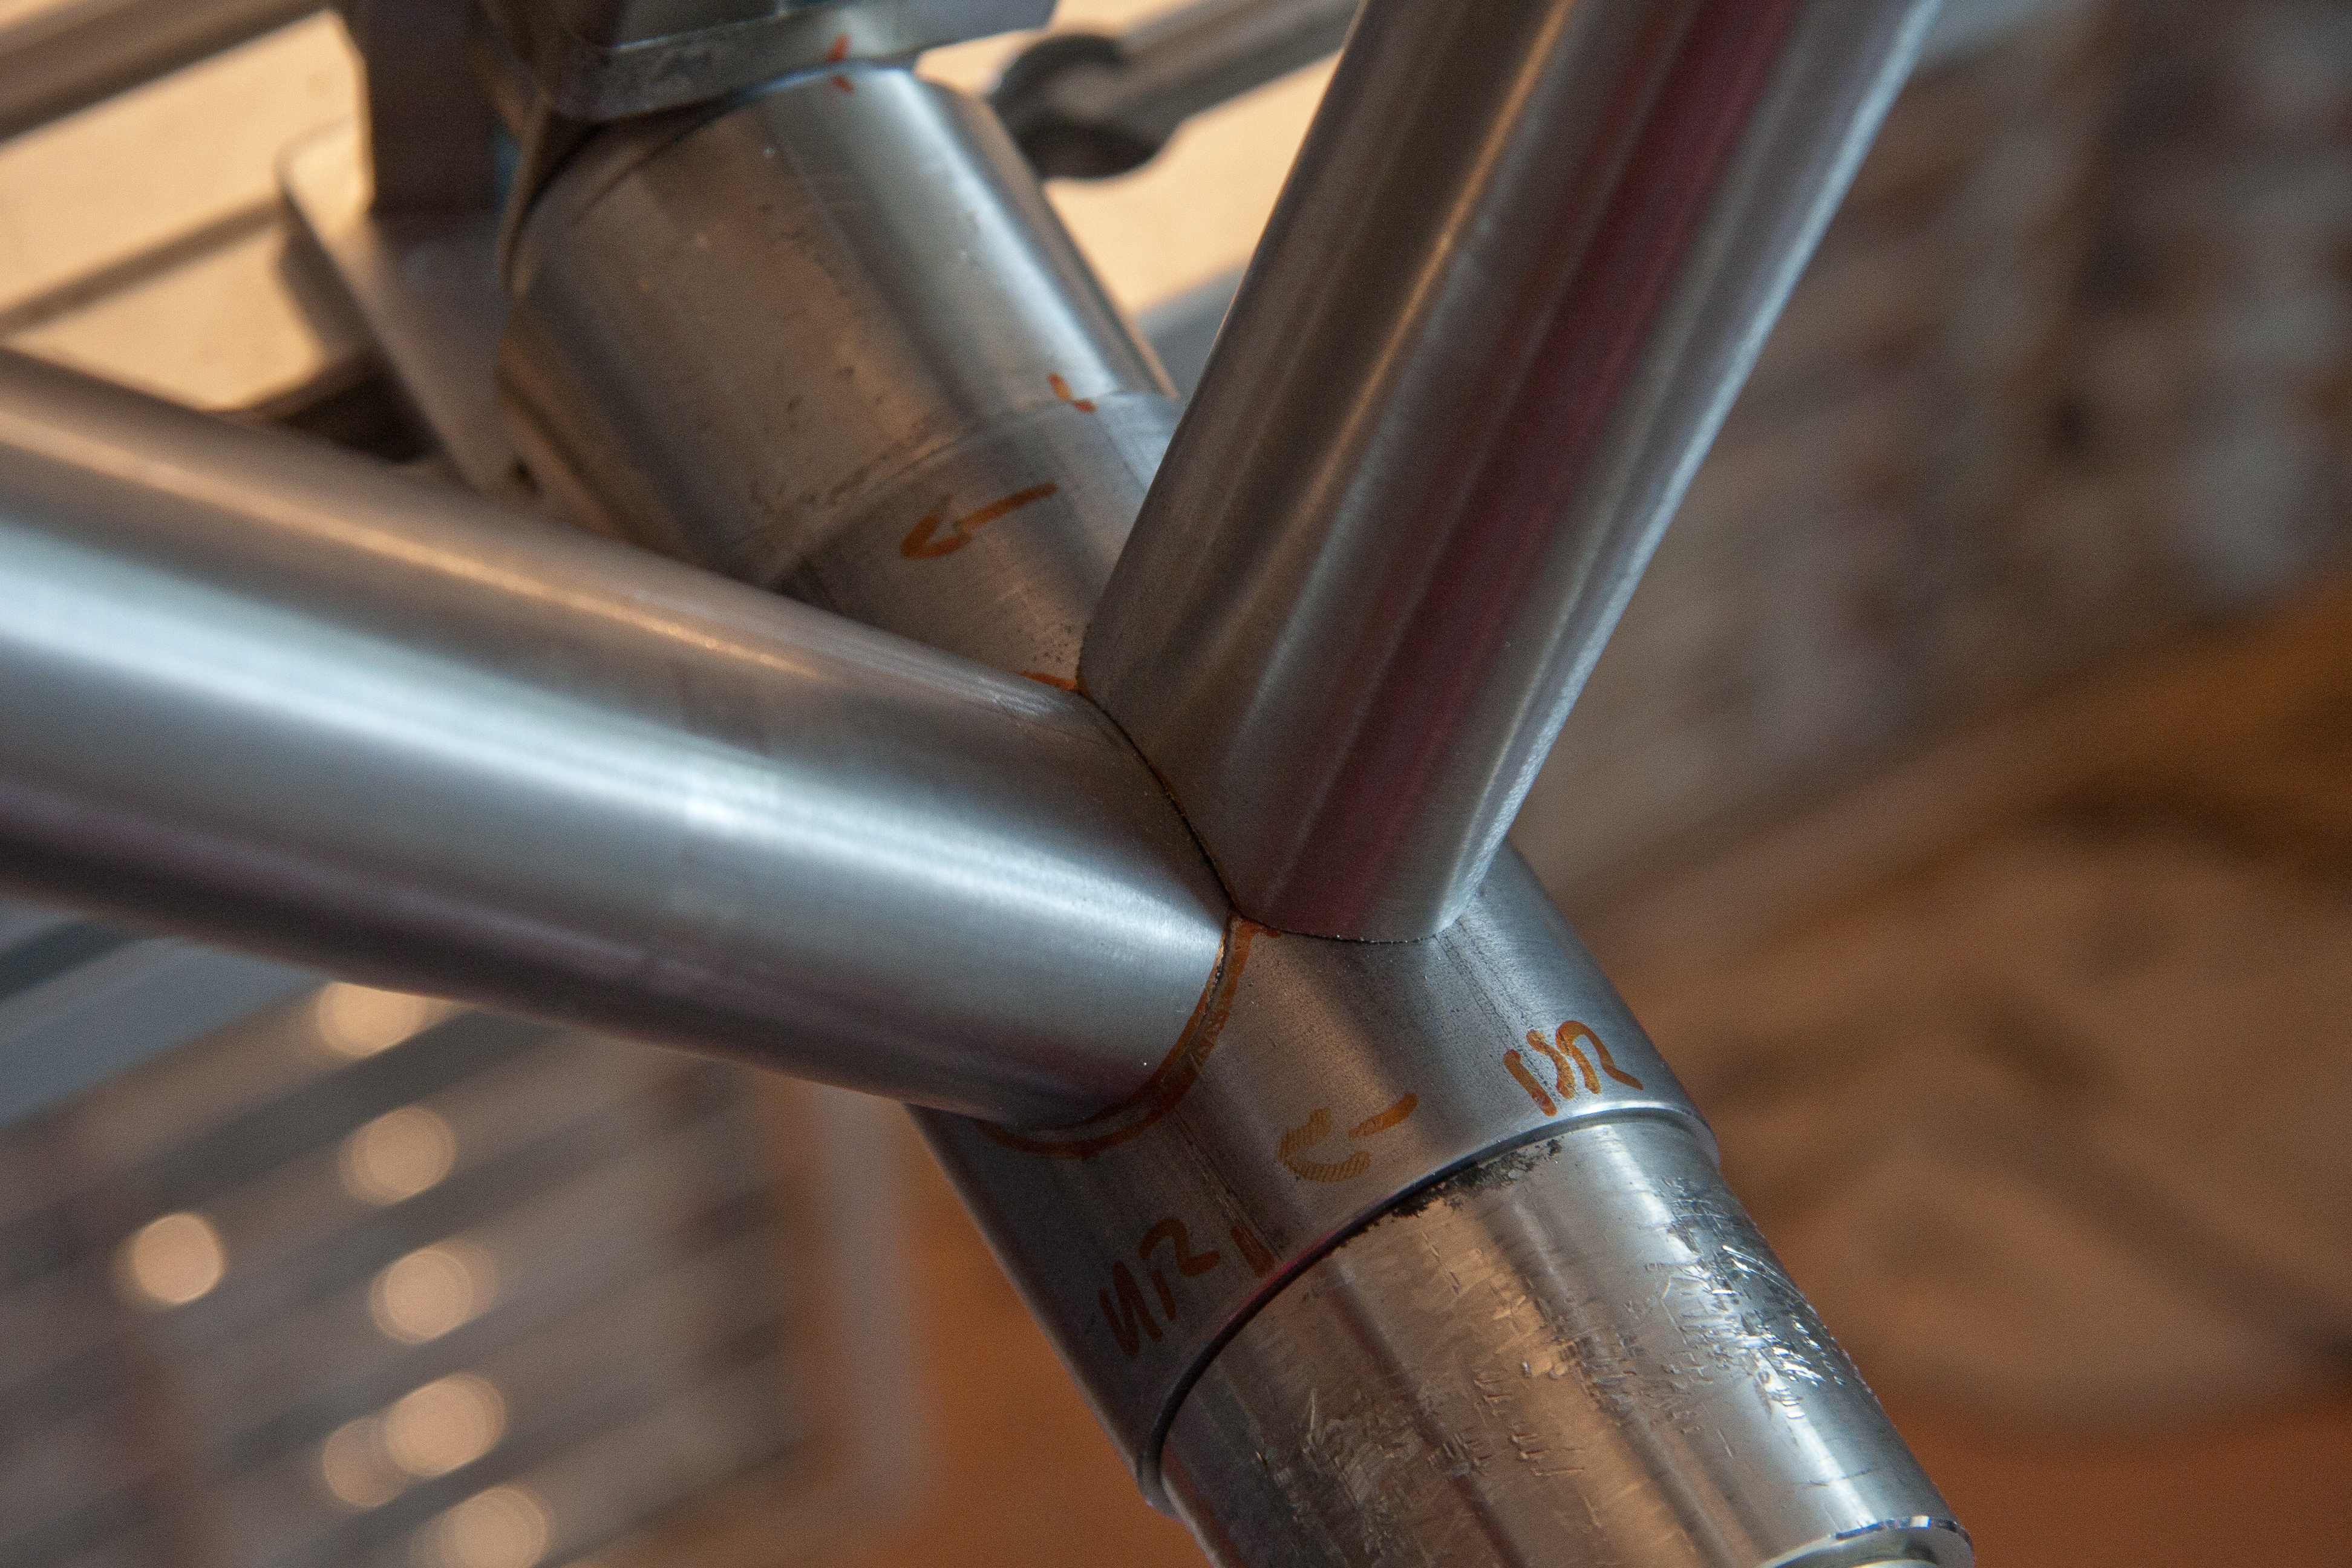
Details Rahmenbau
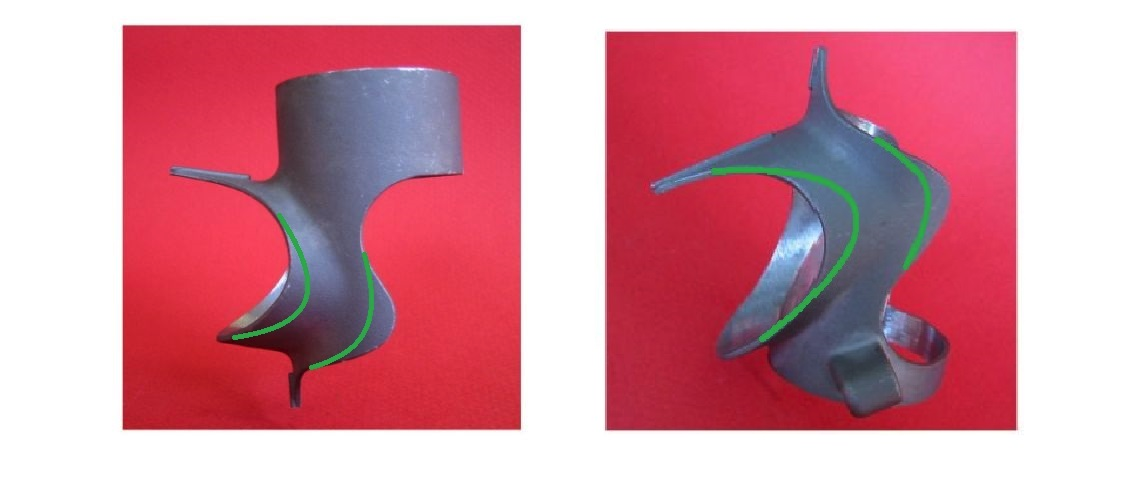
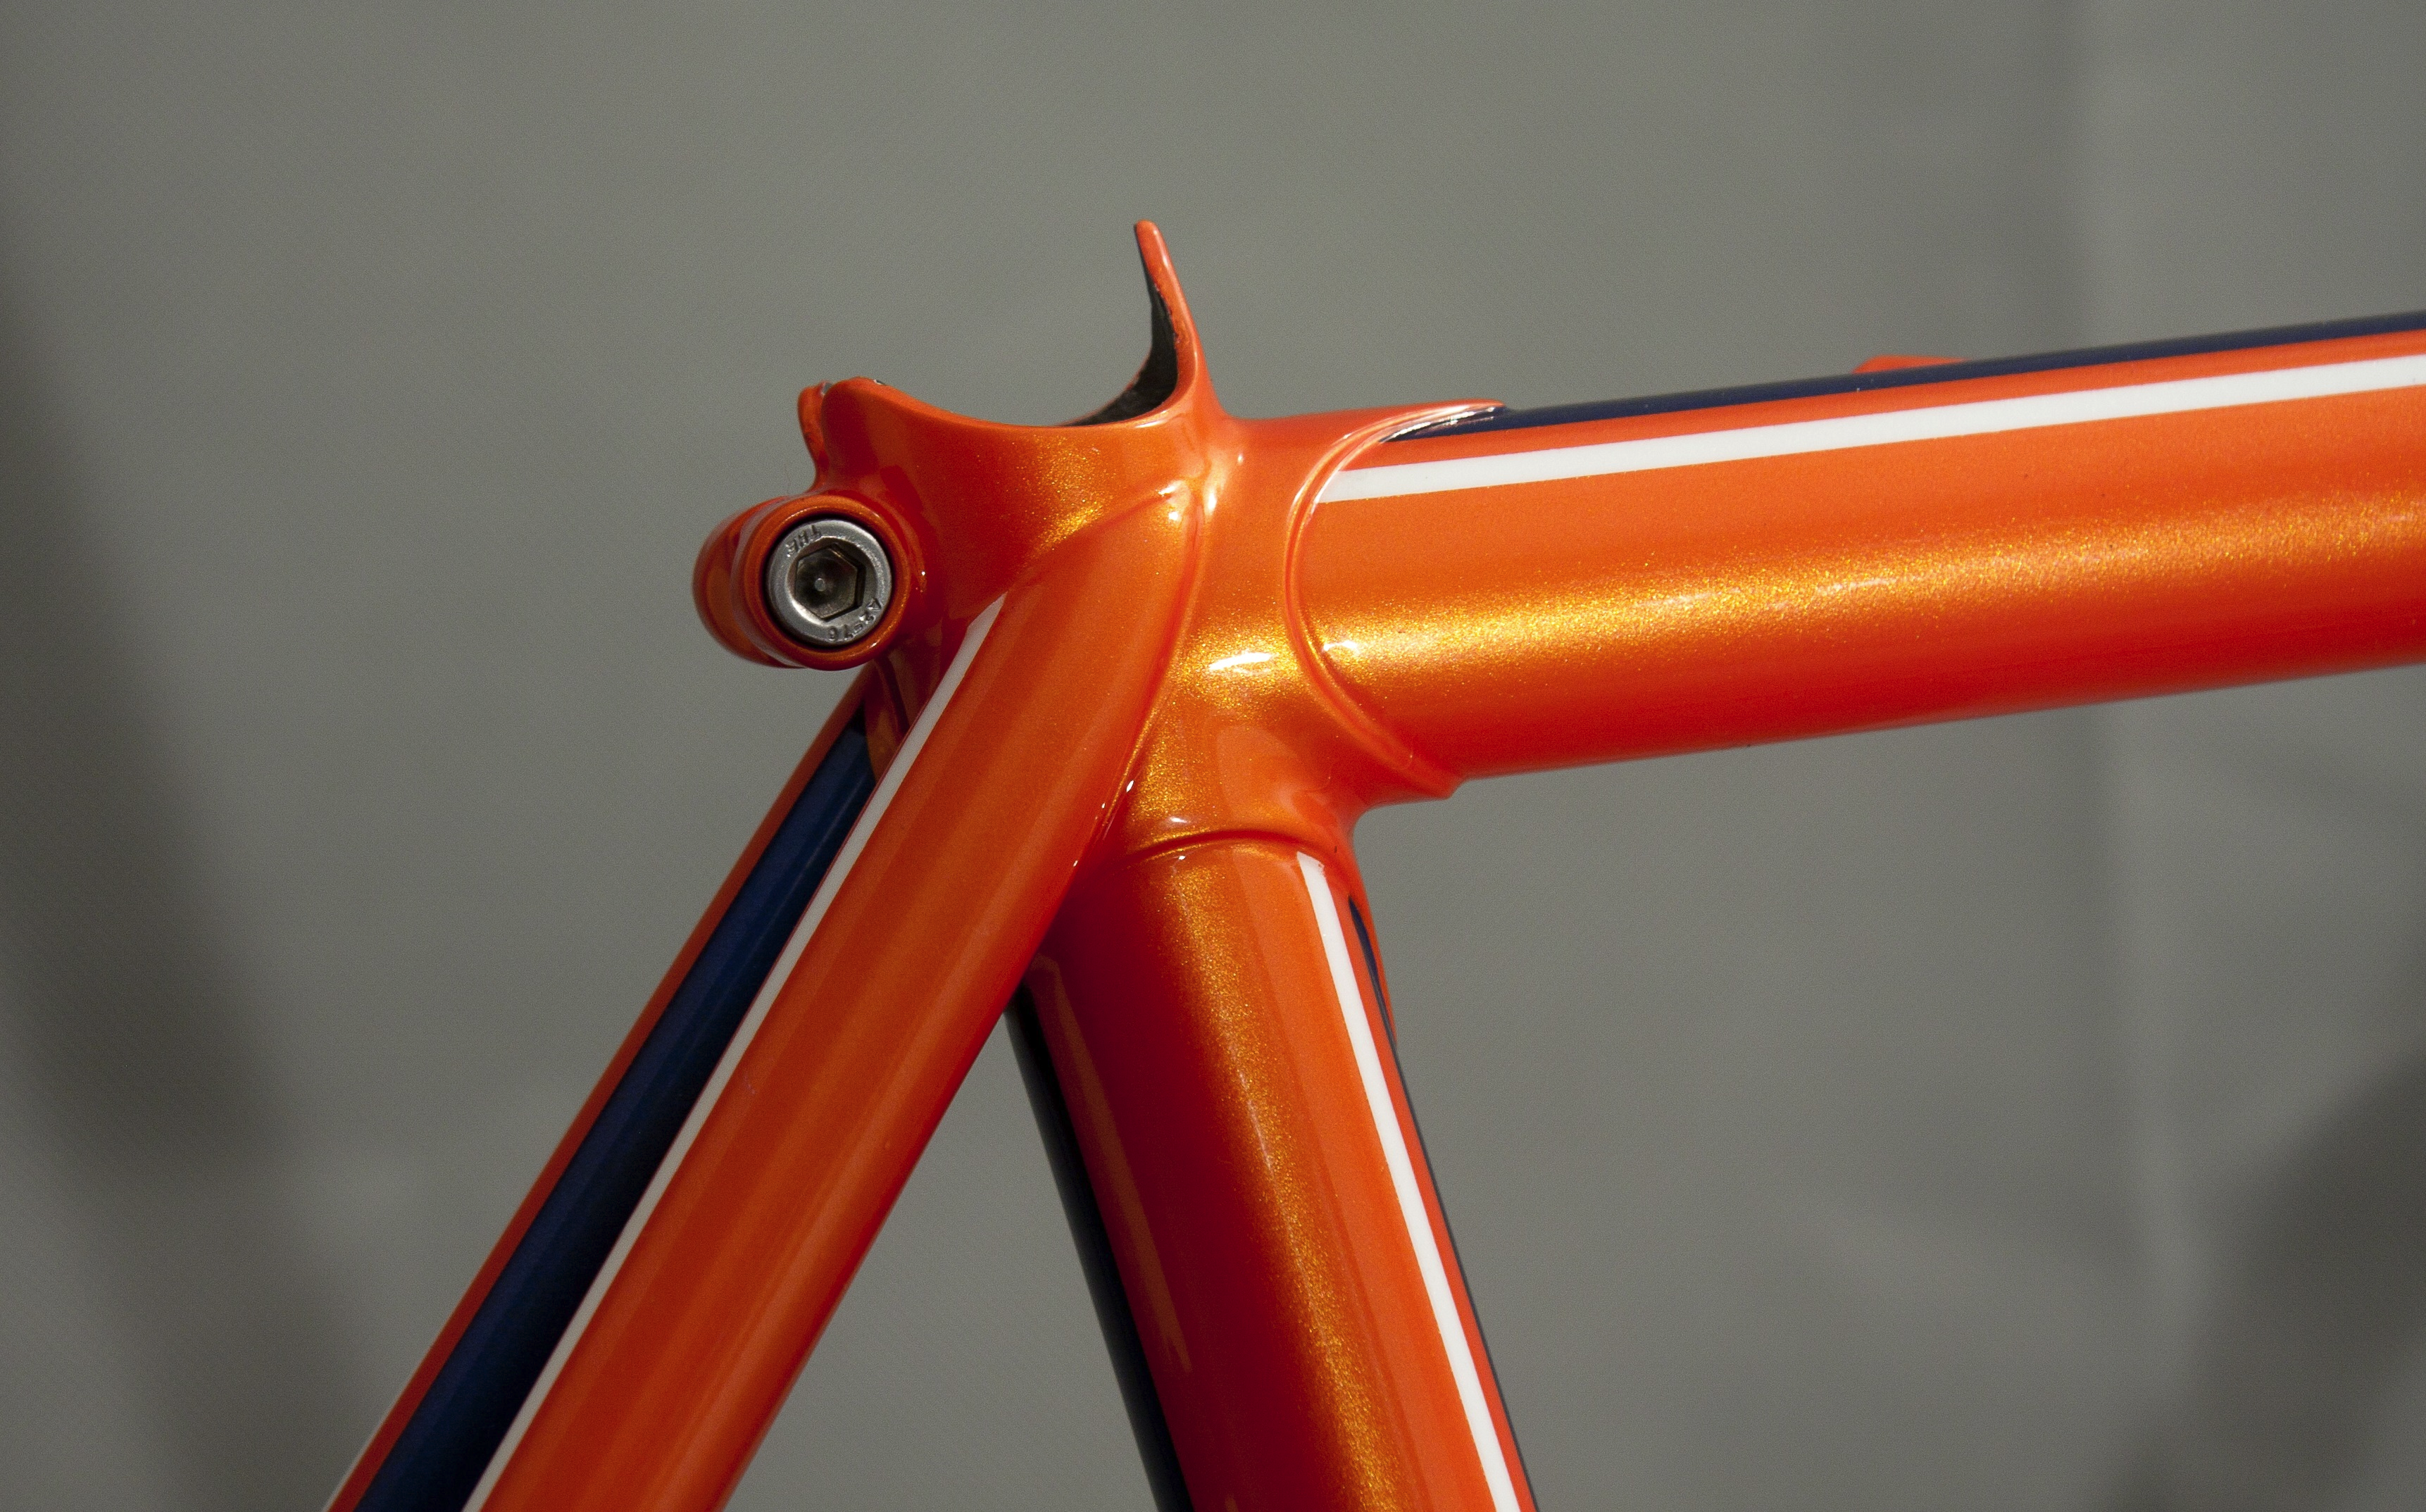
Die Llewellyn Mini6-Muffen haben viele Vorteile: Sie passen für 6° sloping, haben angegossene Zug-Gegenhalter an der unteren Steuerrohrmuffe und eine angegossene Sattelklemme. Ausserdem heissen sie alle paar Jahre wieder anders, derzeit wohl CompactOS.
Da alle Muffen aus dieser Serie für meinen Geschmack etwas zu viel Material haben, wurden sie vor dem Löten etwas optimiert. Dies passt zur Projektidee, auf überflüssiges zu verzichten
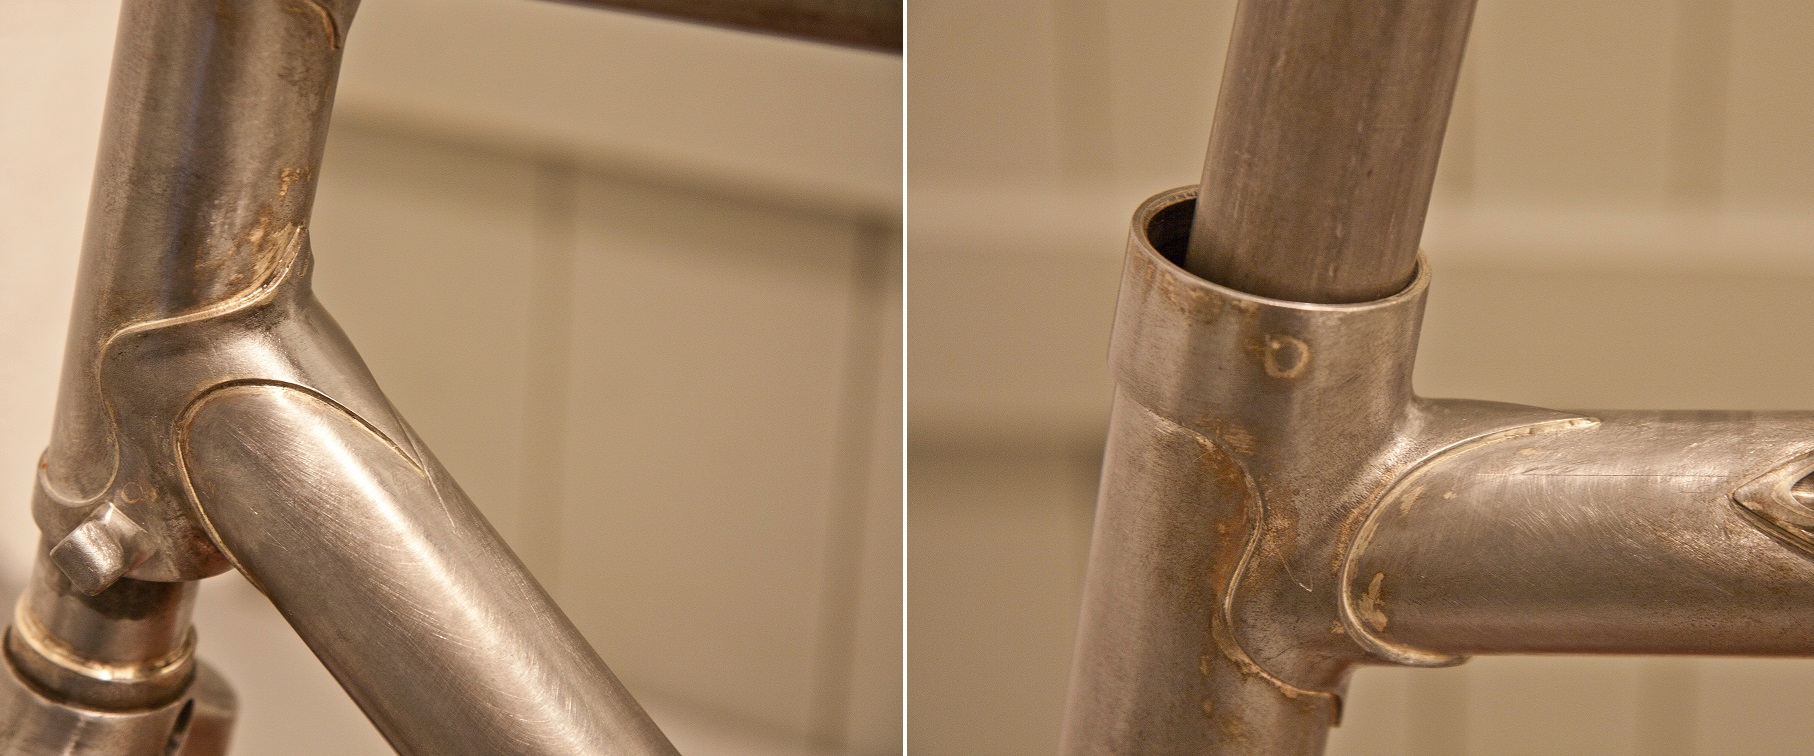
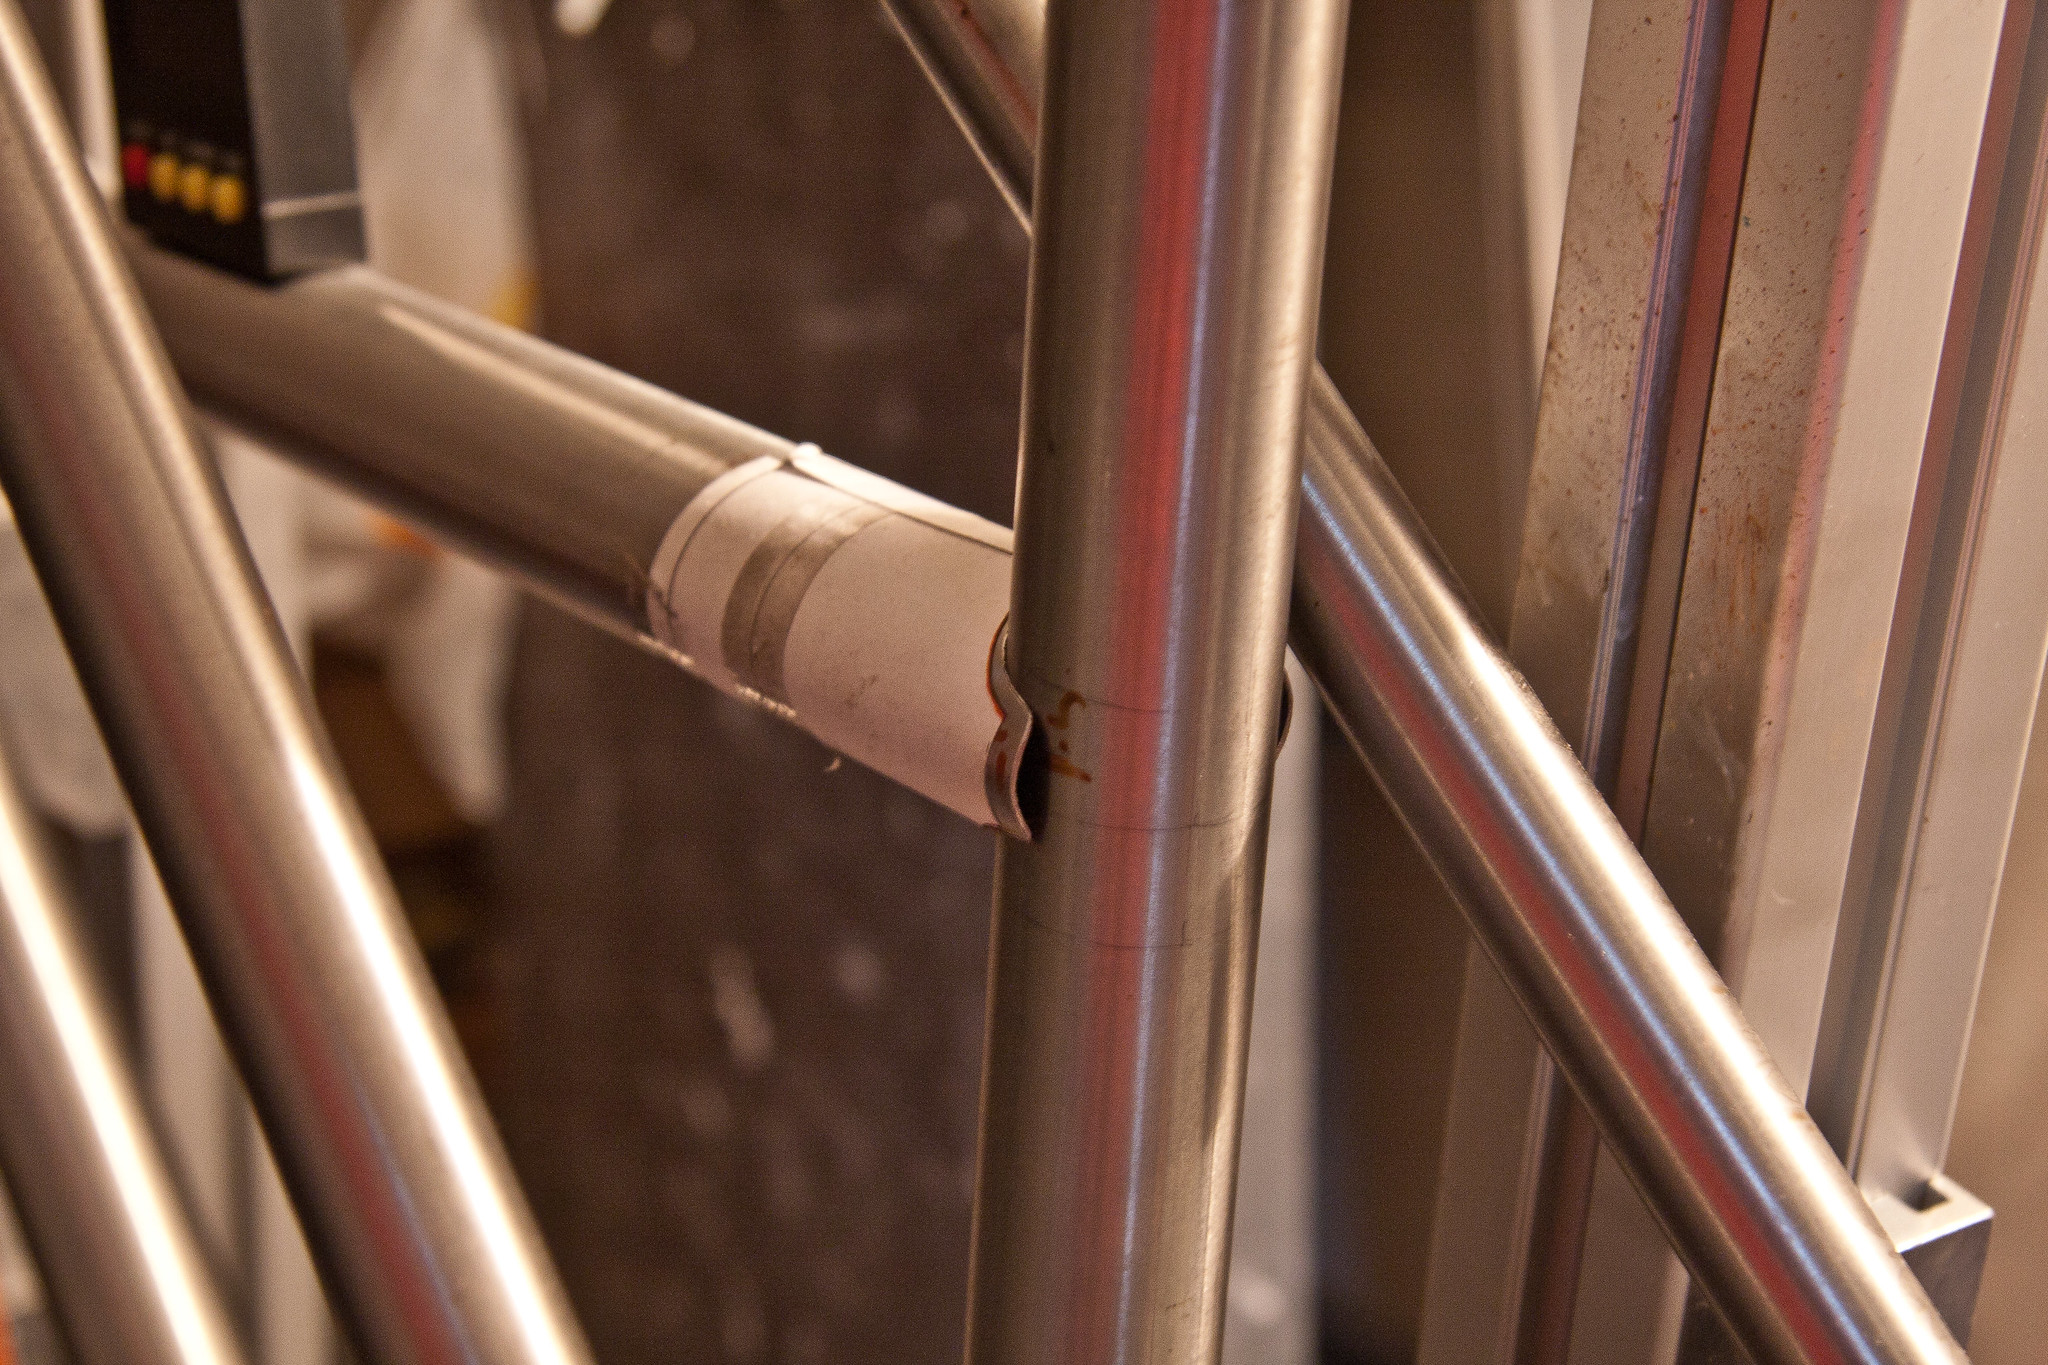
Um die Formensprache fortzusetzen wurden auch die Zuganschläge zugefeilt und abgerundet. Der hintere Bremszug verläuft klassisch in einem Röhrchen im Oberrohr. Die Ein- und Austritte sind so gelegt, daß die Bremszughülle in einem harmonischen Bogen ein- und austritt.
Besonderes Augenmerk lege ich auf den Sitzrohr-Abschluss. Auch dieser folgte in diesem Projekt der Designlinie: Harmonisch, klassisch, dezent.

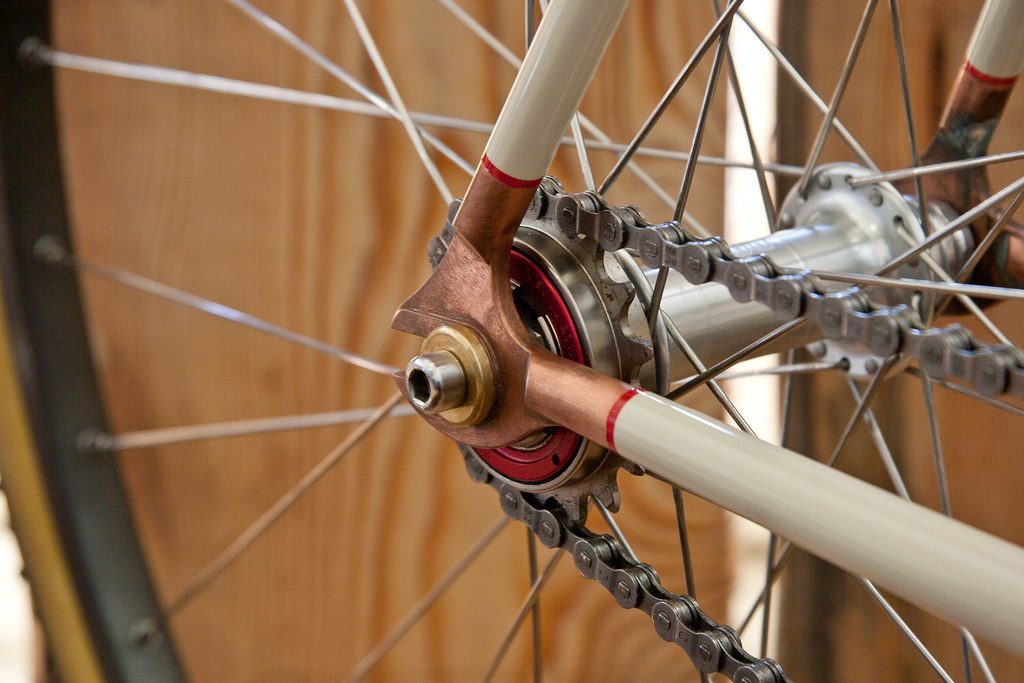
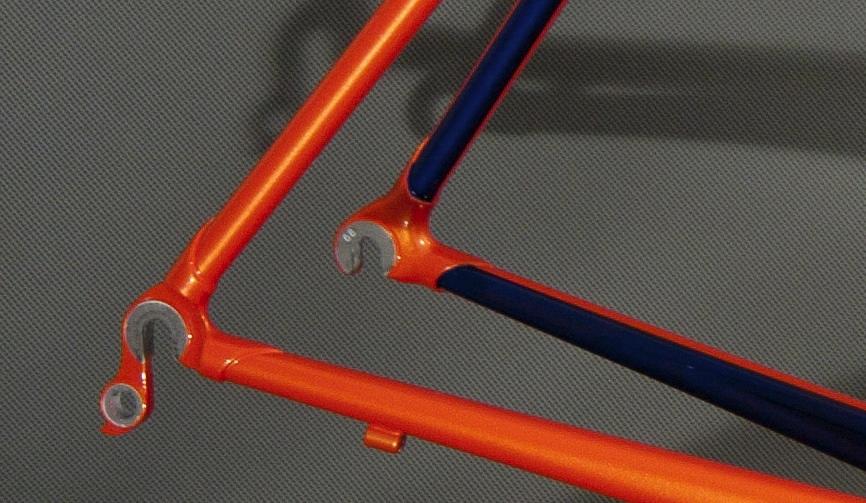
Um unschöne Roststellen im Betrieb zu vermeiden, sind die Ausfallenden aus Edelstahl. Die Kontaktpunkte mit den Naben wurden bei der Lackierung ausgespart.
Design und Farben:
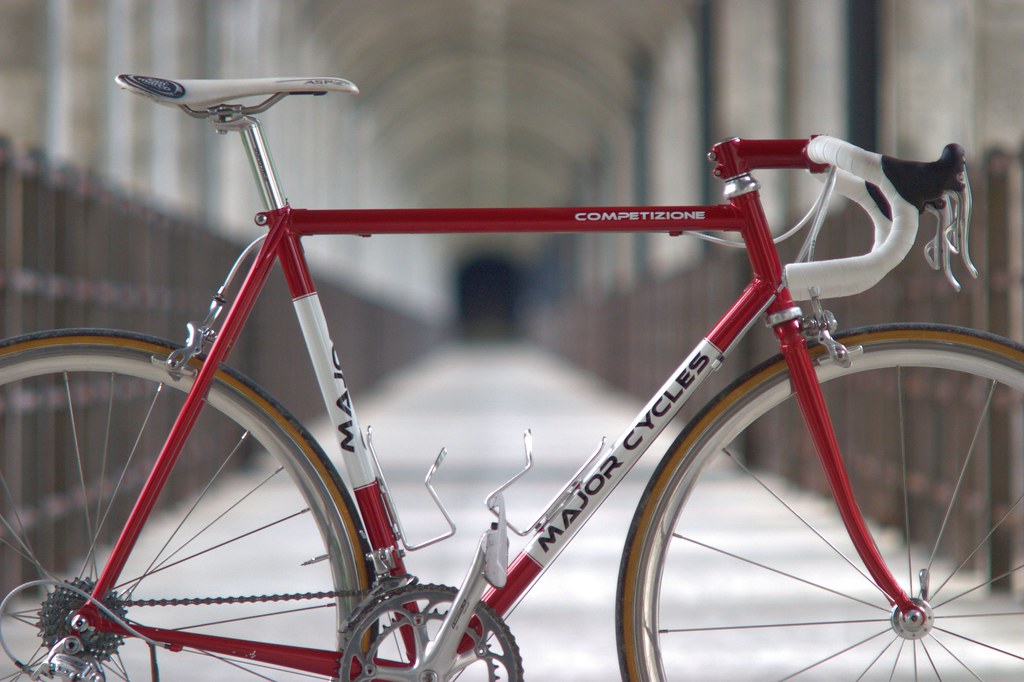
Die Lackierung meines ersten selbstgebauten Rahmens war schnell und einfach entschieden. Schon während der Projektdefinition legte ich mich auf ein “Saronni”-Farbschema fast mit “Alfa Romeo Rosso Competizione” als Hauptfarbe. Dazu weiße Banderolen, und ich war zufrieden.
Geblieben ist aus dieser Zeit die Liebe zu Metallic-Perleffekt-Lacken.
Und seit dieser Zeit sammle ich Farbtöne, die einmal zu einem Projekt passen könnten. Eine der Farben, die mich vom ersten Moment an begeisterten, war das “Inferno Orange” des Toyota GT86
Bei meinem Projekt “Competizione Yana” stellte ich schnell fest, daß es sehr viel schwieriger ist, ein Design für jemand anderen zu definieren. Ich wollte, daß die Grundfarbe zu den Gedanken und Emotionen passt, die meine Frau mit Fahrrädern und dem Radfahren verbindet: Spaß, Freiheit, Freude, Genuß, Geschwindigkeit – aber vor allem Freude. Ich wollte außerdem eine Art feminines Design (dabei überschätzte ich übrigens Ihren Wunsch nach einer femininen Note am Rad total.). Ich startete folglich mit der Idee, im wesentlichen das Farbschema meines ersten Rahmens zu invertieren – also einen Rahmen in Perlweiß-Metallic mit roten Akzenten (ähnlich wie einige 80er-Jahre Eddy Merckx Corsa Extra). Ich dachte, das wäre sehr klassisch, sie fand es langweilig. Ich hatte dann immer noch einen im wesentlichen weißen Rahmens im Kopf, als ich die Idee eines Lackierschemas mit Längsstreifen auf den Rohren entwickelte. Ich stellte meiner Frau viele Fragen zu Farben und Lackierungen, und wir stellten fest, daß sie Orange an Fahrrädern liebt. Schon nach wenigen Wochen hatte ich eine Lösung: Perlweiß-Metallic mit orangen und blauen Streifen.
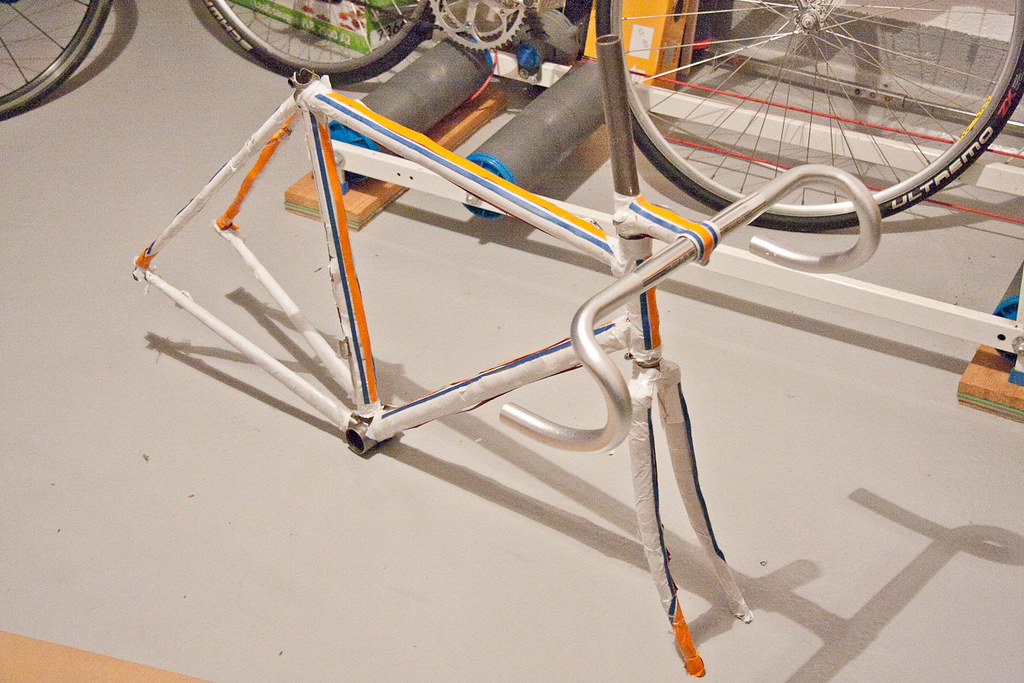
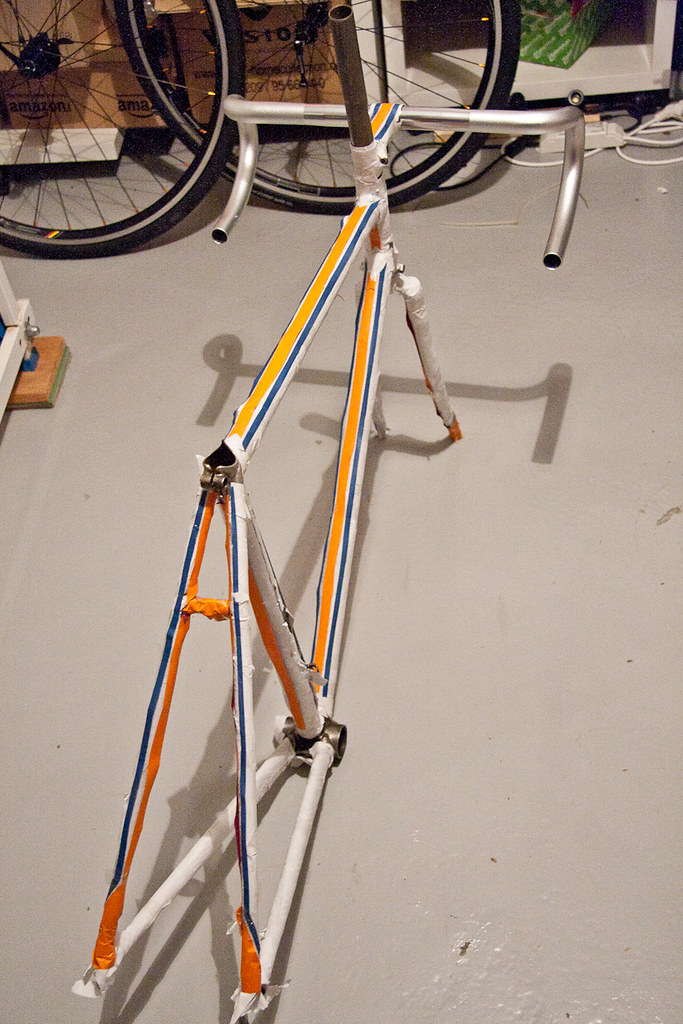
Als “Visualisierung” beklebte ich den Rahmen mit weißem Papier und farbigen Streifen. Ich fand den Look wirklich überzeugend, aber meine Frau fand es zu blass, zu brav. Eben nicht kraftvoll.
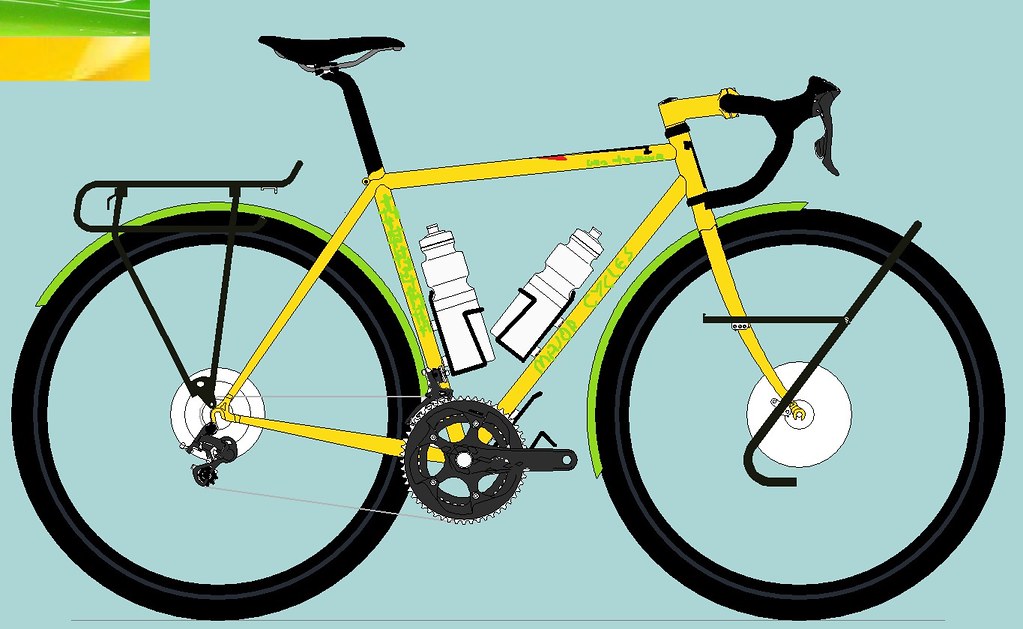
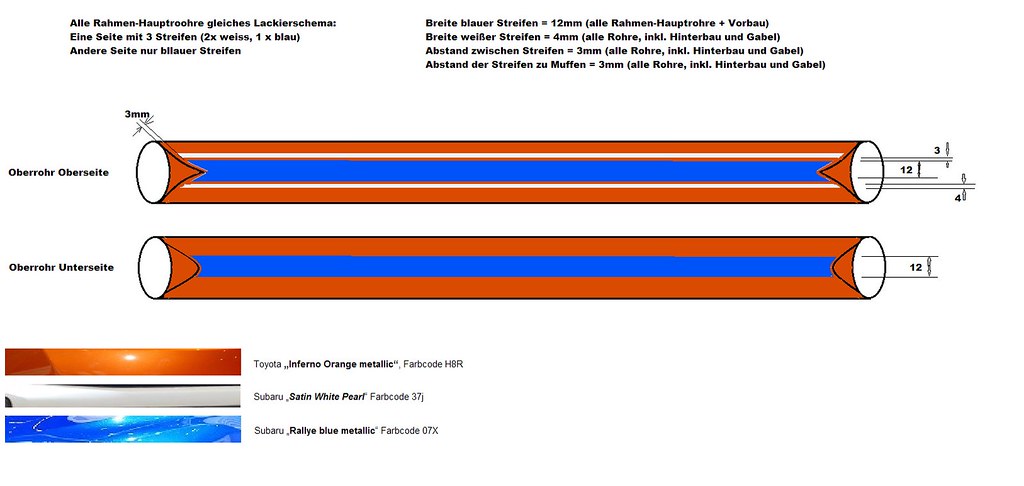
Mithilfe von “MS Paint” und den guten Tipps einiger Freunde konnte ich auf dieser Basis ein Design entwerfen, das es dann in die Realität schaffen sollte. Ich zeichnete sogar Ansichten der einzelnen Rahmenrohre, um ein besseres Gefühl dafür zu bekommen, wie das Design auf dem gemufften Rahmen wirken würde.
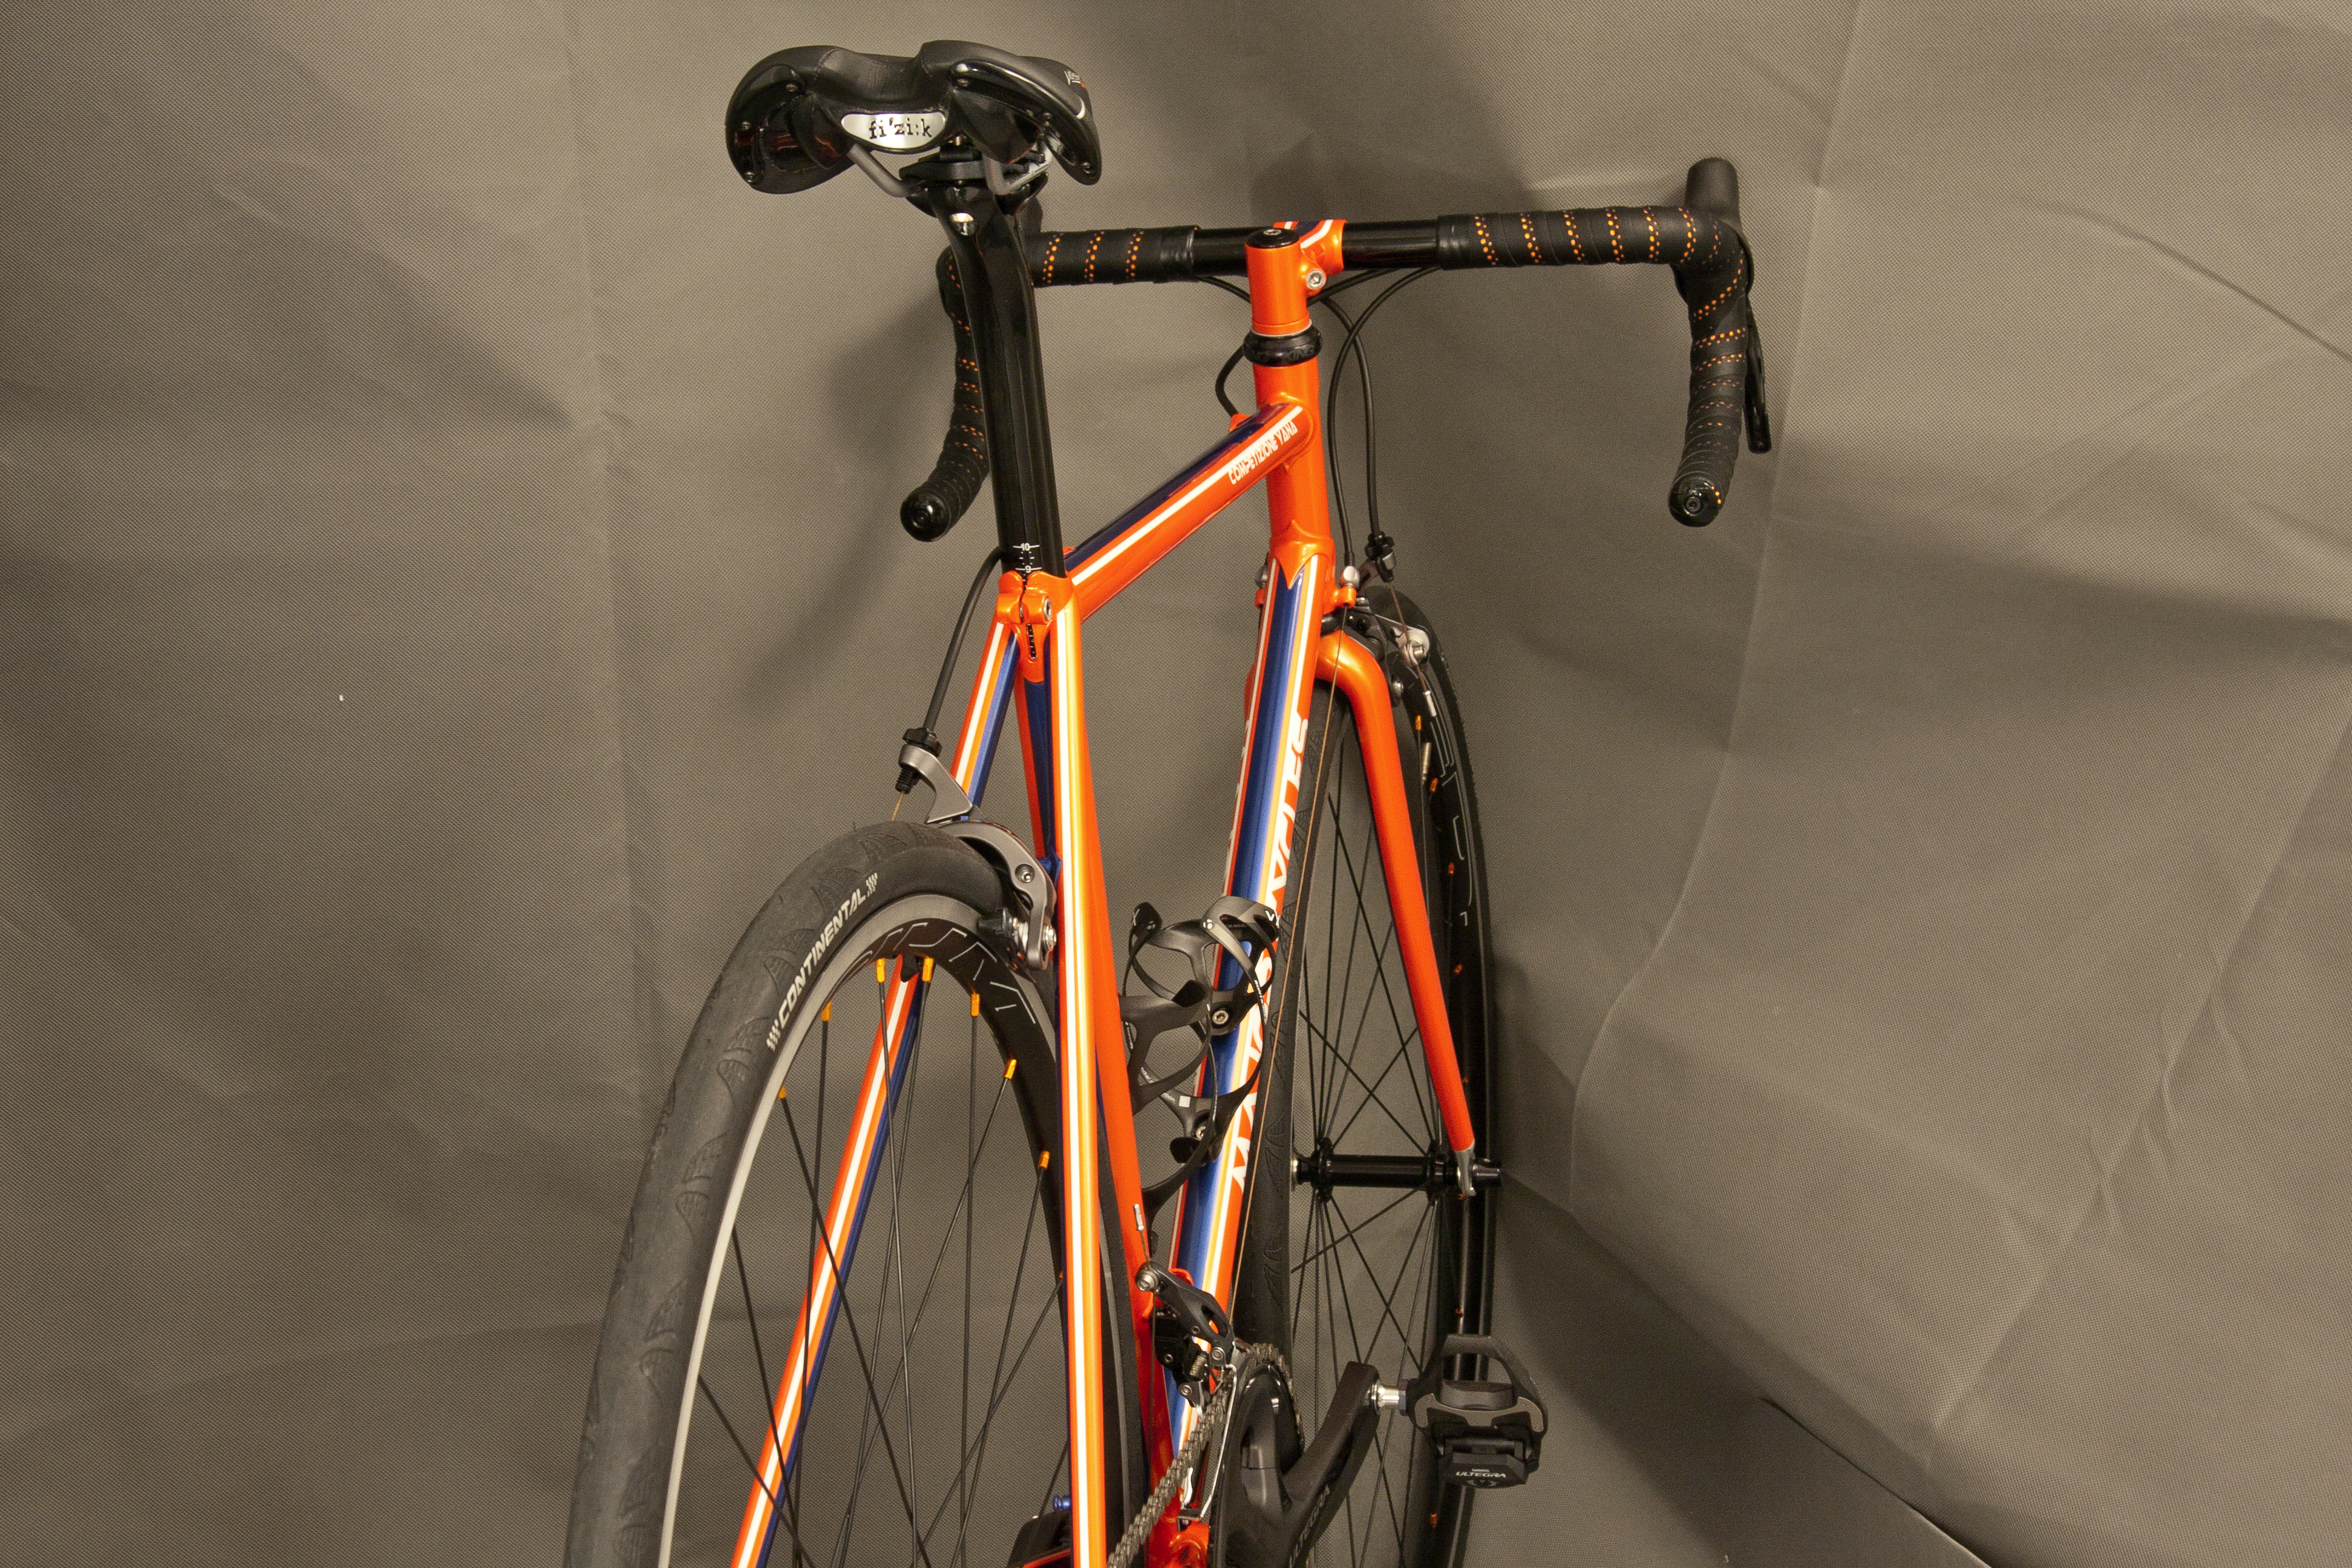
Ergebnis
Ich hatte im Netz ein paar Arbeiten von Alistair McLean (Fatcreations) gesehen, und nach einem längeren Telefonat stand fest, daß der Rahmen dort lackiert werden sollte.
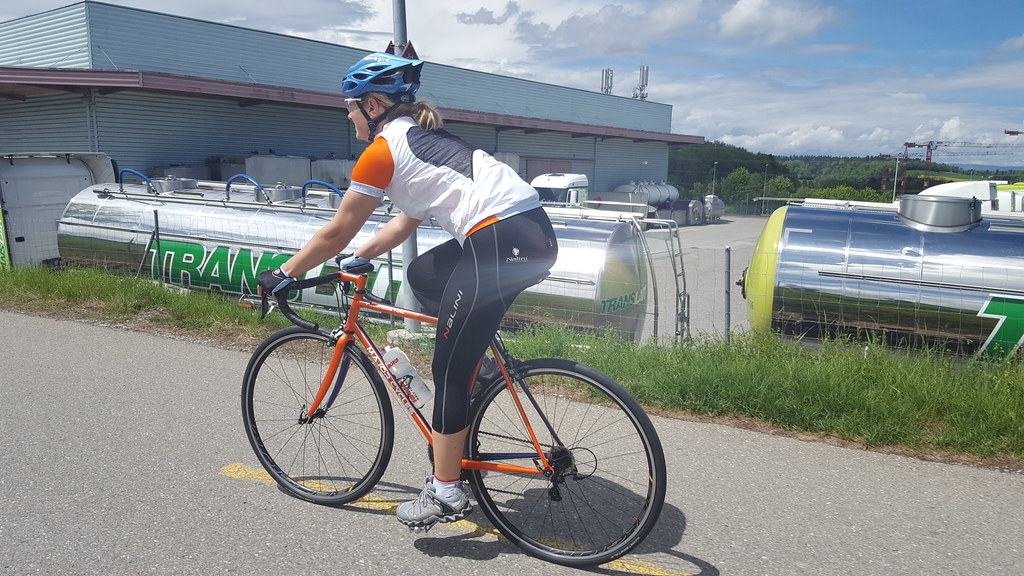
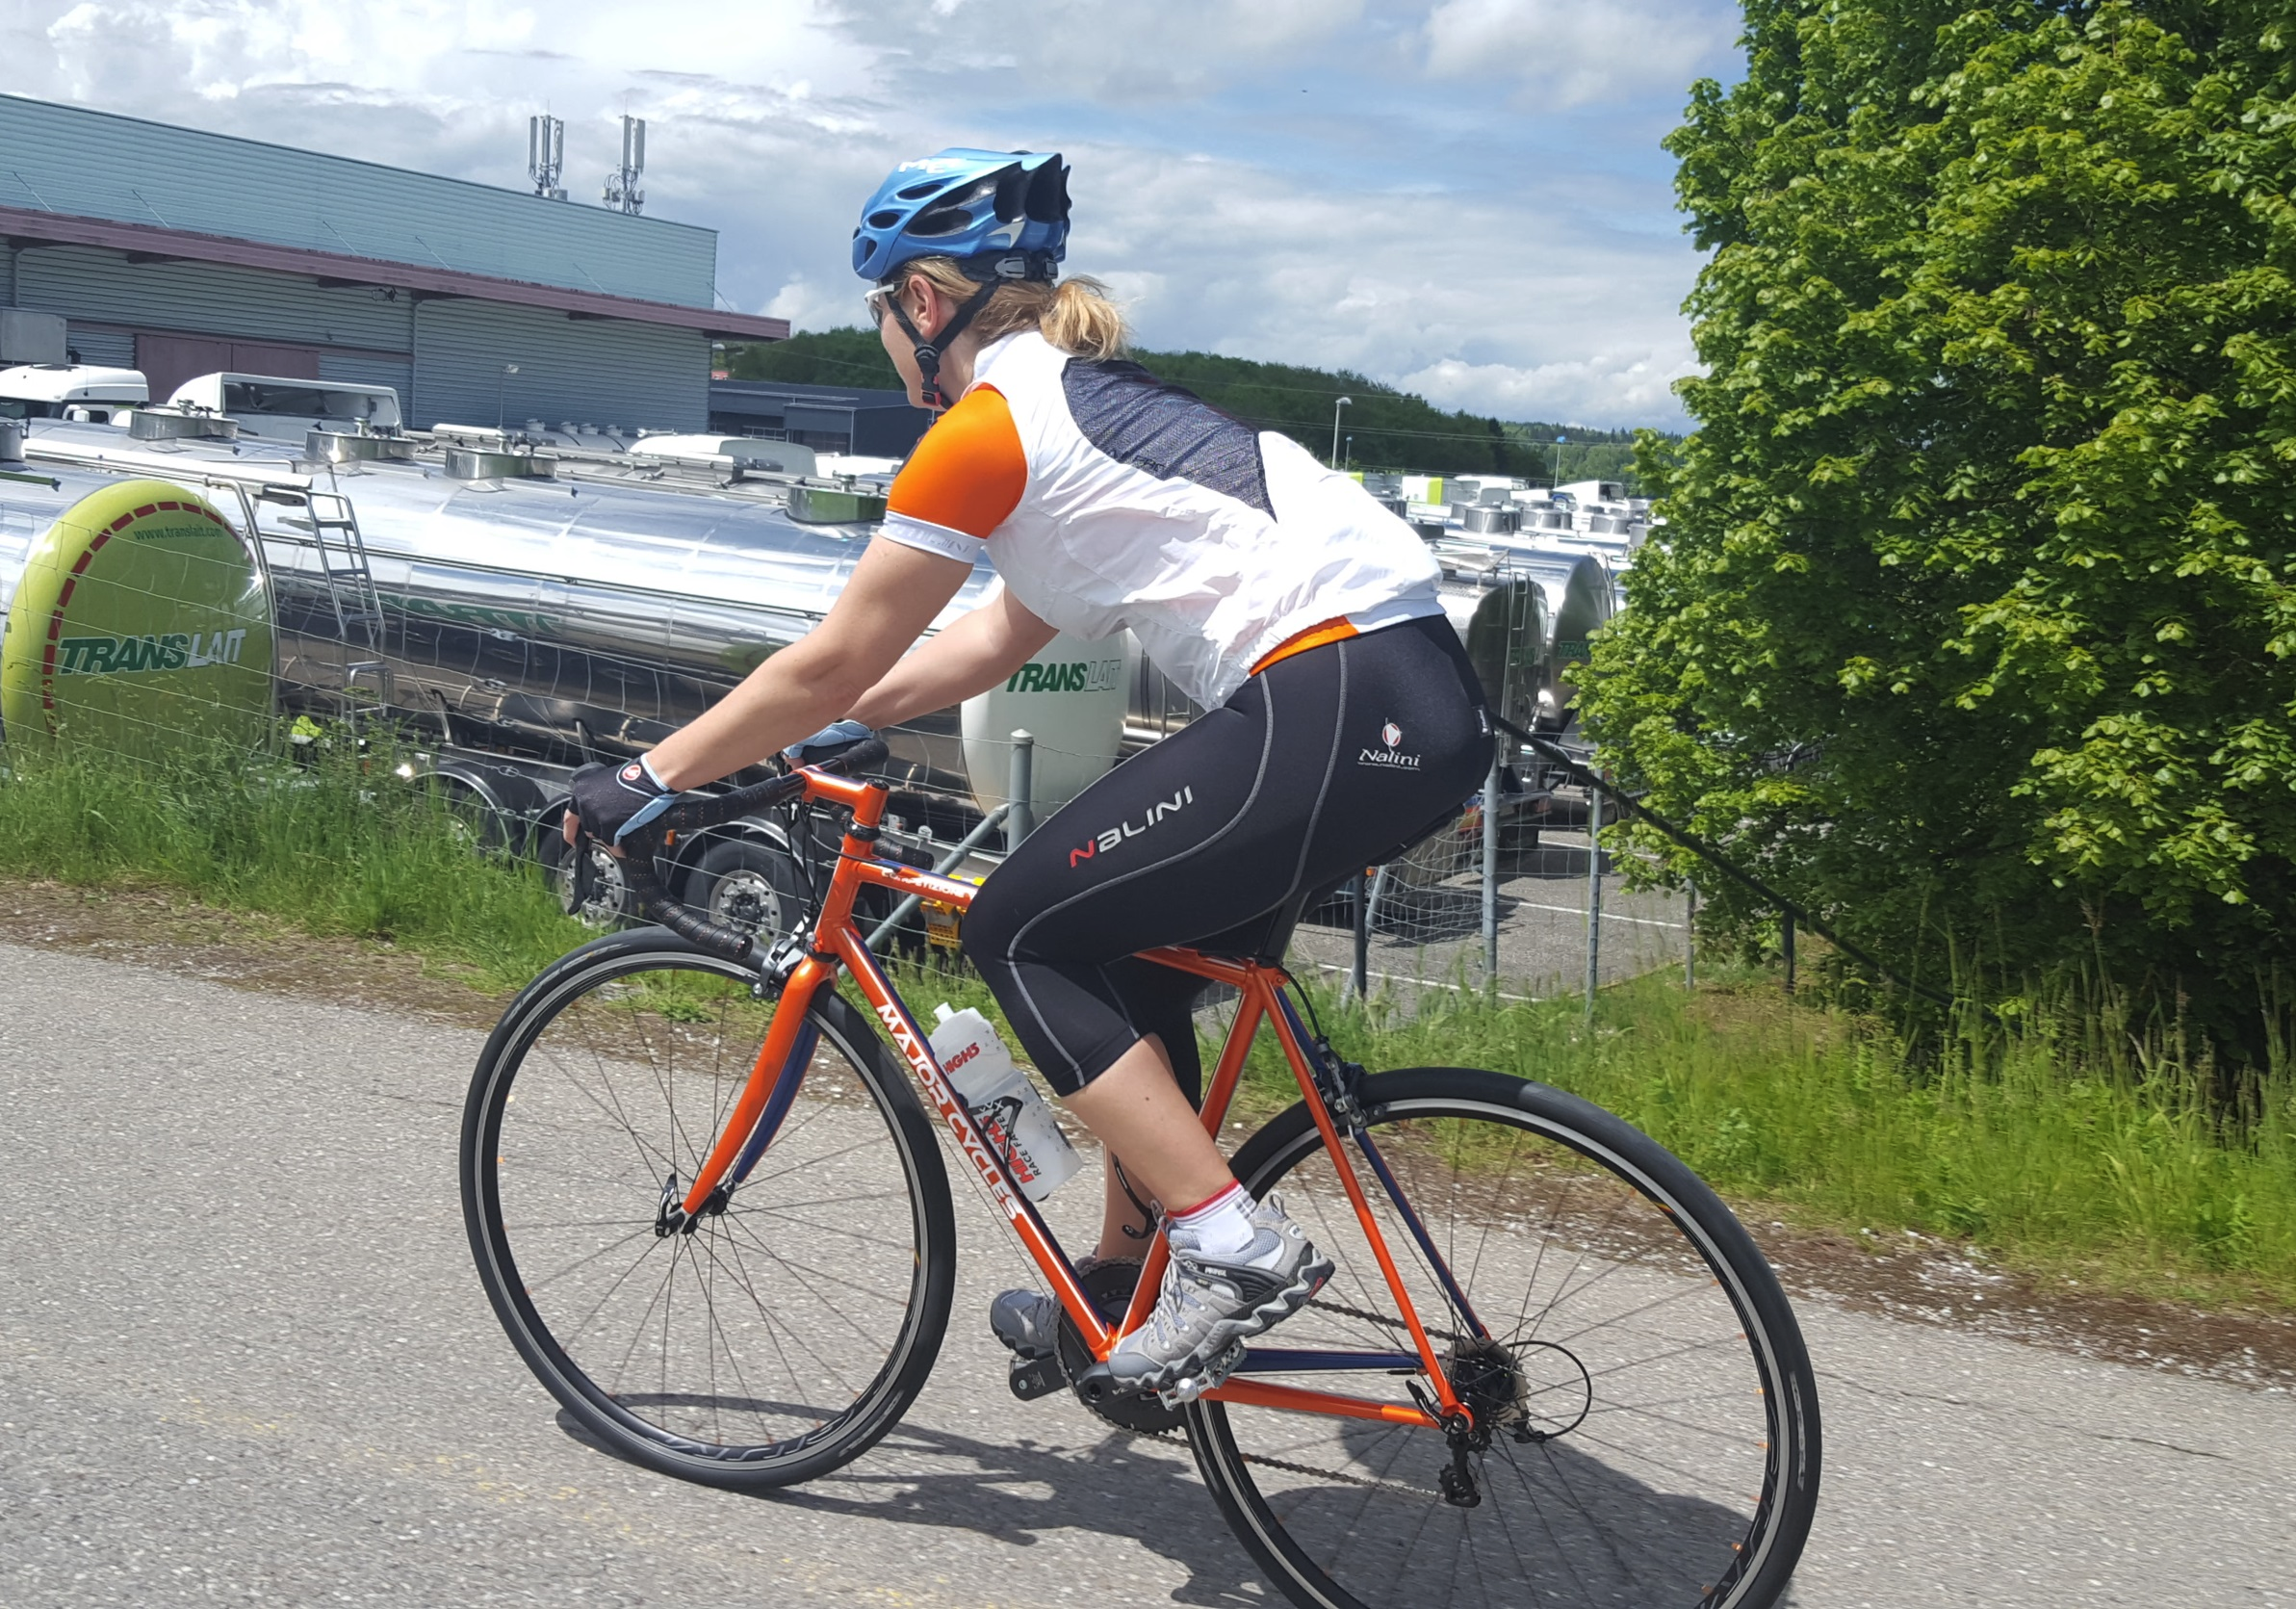
Nach einigen Verzögerungen, die nicht in unserer Macht lagen, war die Lackierung fertig und der Rahmen zurück bei mir. Die Lackierung ist genau so perfekt ausgeführt, wie ich mir das erhofft hatte. Nach einem sehr sehr vorsichtigen Aufbau fährt das Rad nun seit Mitte 2017 auf den Straßen des Seenlandes und des Gruyere rum, und ich habe das Glück, fast immer dabeizusein.


Video vom Rahmen nach dem Lackieren:
Alle Bilder auch auf Flickr: